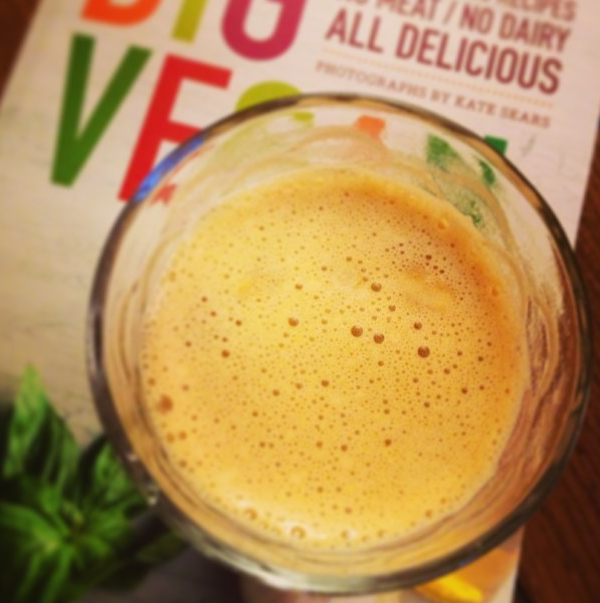
Build a Better Smoothie: A Step by Step Guide

CONFESSION: 

.

I have a dangerous addiction…

.


.


.


.


To smoothies, that is.


Okay…so “dangerous” might seem like too strong a word, but that’s exactly what my smoothie concoctions are…dangerously delicious :) . In fact, I’ve rarely met a smoothie I haven’t liked. I mean, it’s pretty hard to make a mistake preparing something that gets pulverized into a drinkable form– no boiling, baking, sautéing, or julienne-ing necessary. Seriously. It’s pretty much the easiest snack, meal, or treat you can (quite literally) whip up!


Pressed for time? Make a smoothie!

Hungover? Make a smoothie!

Looking to revamp your diet? MAKE A SMOOTHIE!


Okay, okay. I know what you’re thinking– I understand how booties, baubles, and a killer pair of heels can make a girl go wild, but can a smoothie really be that exciting? In one word, YES! And after taking a quick trip to the grocery store you’ll be creating healthier, tastier smoothies while increasing their nutritional value in no time at all. JUST BEWARE– not all smoothies are created equal! If you’re not careful, your “healthy” beverage can quickly become a sugar and fat trap. But don’t worry! With a little guidance you’ll be drinking your way to heath and wellness. Thankfully, I’m just the gal to show you how it’s done :) .


Step 1 : Choose your base

(Ready to have your mind completely blown? THERE AREN’T ANY SPECIAL HEALTH BENEFITS OR NUTRIENTS EXCLUSIVE TO DAIRY MILK! You can easily get vitamins, minerals, protein, and healthy fats from a variety of non-dairy milks– and YES– this includes calcium. But buyer beware– make sure the milk you purchase is fortified, and ALWAYS choose the unsweetened version to avoid excess sugar).

  • Almond milk
  • Cashew milk
  • Coconut milk
  • Coconut water (coconut water contains a decent amount of sugar– take care to cut back on high-sugar fruit like bananas, mangos, figs, tangerines, cherries, and grapes when incorporating a base with high sugar content). 
  • Hazelnut milk
  • Hemp milk
  • Oat milk
  • Soy milk
  • Water
  • Pretty Fit Note: Stay away from juice! If you are already adding fruit to your smoothie this will cause it to have wayyy too many grams of sugar and carbs (and not to mention calories)  for one drink.  

Organic nut, soy, hemp and oat milks are fantastic alternatives for those  trying to cut dairy from their diet. Personally, almond milk is my favorite smoothie base. The creamy texture and nutty taste give my smoothies just the right consistency and flavor I’m looking for. Plus, almond milk is super low in calories (only 35 to 40 calories per cup in the unsweetened brands) and contains the calcium and vitamin D my vegan body needs! With any of the milks mentioned above, be sure to buy the unsweetened versions or you could find yourself unknowingly drinking over 15 grams of sugar before you even add anything else to the blender. Yikes! I also suggest taking a look at the ingredients list and aim to avoid purchasing milk with the ingredient carrageenan– a seaweed-derived texturizer found in meat, dairy, toothpaste, processed foods (even some organic products and infant formula!) which can lead to severe gastrointestinal inflammation among other health risks. My favorite (safe!) brand is Whole Food’s 365 Plain Unsweetened or Unsweetened Vanilla Almond Milk. (Research regarding the side effects of this controversial additive is still new but growing. I encourage you to do some research on your own, or check out some helpful links in my Sources List below).


Step 2 : Pick your greens

(Leafy greens –full of vitamins, minerals and disease-fighting phytochemicals– are some of the healthiest foods you could ever eat. Their high water content keeps you hydrated, while their high fiber content fills you up, lowers your blood-pressure, and lowers your bad cholesterol. For more detailed information about the specific health benefits of the greens below, visit this link).

  • Collard greens (rich in calcium!)
  • Cucumber
  • Dandelion greens
  • Kale (rich in calcium!)
  • Lettuce
  • Mustard greens
  • Spinach
  • Sprouts (Sprouts can contain up to 100 times more enzymes than raw veggies and fruit– this helps your body to extract more amino acids, vitamins, minerals, and essential fats from foods you consume– so eat up!). 
  • Swiss chard
  • Turnip greens
  • Watercress


According to the latest dietary guidelines, the average person should aim to consume at least 2.5 cups of vegetables a day (Pretty Fit Note: For lettuces and other raw leafy greens, you would need to eat 2 cups to get the equivalent of 1 cup of vegetables). Now, for someone like me who eats veggies with every meal, hitting 2.5 cups doesn’t seem like much trouble, however, the majority of Americans don’t reach the recommended daily dosage–and that’s where I come in :) . Adding greens to your smoothie is the easiest and most painless way to help get proper the nutrients you need in one quick and easy swoop. I go through bags upon bags of spinach in one week alone– I find it’s the easiest to blend. Still weirded out by the green tint in your drink? Don’t worry! You’ll be adding so many other tasty ingredients to your smoothie you won’t be able to taste a thing– I promise. So don’t go holding back on me now! This is your chance to get a little nutrient crazy. Your body will thank you.


Step 3 : Get fruity!

(Fruit is full of fiber, vitamins, minerals, antioxidants, and phytonutrients that ward off disease and keep you healthy! The bonus? It will satisfy your pesky sweet tooth too! The natural sugar is a better alternative to the unhealthy, refined stuff.)

  • Apples
  • Apricots
  • Bananas
  • Blackberries
  • Blueberries
  • Cantaloupe
  • Cherries
  • Guava
  • Honeydew melon
  • Kiwis
  • Lemons
  • Limes
  • Mangos
  • Oranges
  • Papaya
  • Peaches
  • Pears
  • Pineapple
  • Raspberries
  • Strawberries
  • Watermelon
.
Now it’s time for the fun part! The fruit you add to your smoothie really sets the flavor profile of your beverage– so don’t be shy…get inspired! If I’m craving something tasty and tropical, I’ll throw half a cup of pineapple and a few chunks of banana in the blender. If I’m feeling sluggish and run-down, I’ll make an antioxidant-rich smoothie with a cup of mixed berries and watermelon. If I want to detox my body and improve digestion, I’ll whip up my Green Superstar Smoothie using half of a pear and half of an apple. Just take care not to go overboard– fruit is full of fiber, minerals and nutrients that are good for you, but too much fruit can equal lots of extra sugar, carbs, and calories! According to the latest dietary guidelines, the average adult should aim for 2 cups of fruit in a day (if you exercise less than 30 minutes each day). I try to use no more than one cup of fruit in my smoothies since I often have fruit for a snack during the day. However, if I’m feeling extra fruity on a particular occasion (ha-ha-ha ;) ) and one cup just won’t do it, I aim to pick fruits with a low sugar content like raspberries and blackberries. Check out this helpful link for more information about the sugar content of popular fruits.


Step 4 : Mix it up!

  • All-natural extracts (almond, anise, chocolate, cinnamon, coconut, hazelnut, peppermint, vanilla).
  • Almond meal (for when you need a dose of healthy fats and extra protein!)
  • Avocado (this ingredient creates a silky, smooth, indulgent smoothie!)
  • Bee pollen (not for strict vegans– bee pollen is said to enhance energy, boost the immune system, and support the cardiovascular system).
  • Canned pumpkin (full of vitamin A, iron, and fiber)
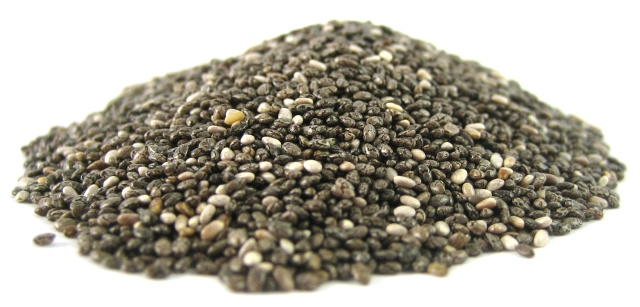
  • Chia seeds (blend or mix these in at the very end and let you smoothie sit for 20 minutes or so– the chia seeds will expand in size and thicken your beverage right up. Plus they’ll give you a healthy dose of Omega-3 fatty acids to boot!).
  • Coconut oil (full of medium chain triglycerides that have the ability to raise HDL– good cholesterol. Coconut oil may also help to encourage weight loss).
  • Dates (a heathy alternative to sugar)
  • Flavor-infused liquid stevia (you can find this at Whole Foods or online– I love the SweetLeaf or NuNaturals brands). 
  • Flax seeds (always choose ground flax– this allows for better absorption).
  • Honey (in moderation! Not for strict vegans).
  • Maple syrup (in moderation!).
  • Molasses (in moderation!).
  • Powdered stevia
  • Powdered peanut butter (100% organic, 95% less fat, and 45% fewer calories than regular peanut butter– perfect for when you’re craving that peanut taste without all the extra fat calories!).
  • Protein powder (I stick to organic, raw protein powders like Garden of Life RAW and limit protein powders that contain soy protein isolate-- a genetically modified type of soy that resembles estrogen). 
  • Shredded carrots
  • Spirulina
  • Sweet potato (gives your smoothie great texture).
  • Tofu (preferably mori-nu silken tofu– it comes in a small cardboard box and lacks the aftertaste present in your typical water-packed tofu).
  • Vanilla beans (enhances flavor BIG TIME).
  • Yogurt (plain soy or coconut-milk based–sometimes I like to use a few tablespoons to thicken up my smoothie. Just keep an eye out for sugar content on those nutrition labels!)
  • Xanthan gum (a thickening agent that will make your smoothies more pudding-like–but BE WARNED! A little pinch goes a long way!).
.
Now here’s where the real danger begins. Pump up the nutritional value and play around with flavor, sweetness, and consistency by adding some unique ingredients to your smoothie (I gave a little more commentary in this section because some of these ingredients might not be as well-known to everyone). Some of my favorite healthy add-ins are almond extract, canned pumpkin, chia seeds, dates, ground flax seeds, raw protein powder, and vanilla flavored liquid stevia.

.

Step 5 : Get spicy!

  • Cilantro (a powerful, natural cleansing agent).
  • Cinnamon (regulates blood sugar, lowers LDL (bad) cholesterol, contains natural anti-infectious compounds).
  • Nutmeg  (aids in sleep, strengthens your immune system, acts as an anti-microbial, helps ease digestive troubles, keeps your brain sharp/may help protect it from degenerative diseases).
  • Cayenne pepper (boosts your metabolism, fights inflammation, prevents stomach ulcers, and reduces bad cholesterol levels).
  • Ginger (eases digestion, eases nausea, reduces inflammation, and protects against certain cancers such as colon and ovarian).
  • Parsley (protects against rheumatoid arthritis and is a rich source of anti-oxidants and folic acid).
  • Raw Cocoa Powder (cocoa is one of the highest polyphenol-containing foods!).
  • Turmeric (turmeric is a powerful, natural anti-inflammatory– I take turmeric pills every day).


Spices have incredible health benefits–some  have the ability to curb inflammation, detox the body, boost flavor, curb appetite, and lower blood pressure. They’re also the perfect addition to any smoothie! I adore the combination of cocoa powder and cayenne pepper (spicy chocolate is one of my FAVORITE flavors) as well as nutmeg and cinnamon (it reminds me of the cozy holiday season!). For my water-based green smoothies, I’ll throw in a handful of cilantro and parsley to help balance my body and get it back to an alkaline state. (For more information about transitioning your diet and body to an alkaline state, check out this link).


Step 6 : Ice, ice baby

This one’s easy. Toss in a few ice cubes to make your smoothie extra cold and creamy :) . I wouldn’t have mine any other way!


Step 7 : Blend it up

If you are lucky enough to own a Vitamix, you can blend any and every ingredient under the sun in one of those babies. While I don’t personally own a Vitamix (yet!) I do own a Ninja blender (which I use on the regular) and it’s pretty amazing. I’ve also used the Magic Bullet and Nutribullet in the past– they can blend most things pretty well, but I prefer to make big batches of smoothies at a time so I can prepare/freeze them for the whole work week (therefore, upgrading to a blender-style Ninja was the best option for me). Now, all that’s left for you to do is blend up all those crazy ingredients you pulled together and let the magic begin!


Step 8 : Top it off

  • Almonds
  • Chopped walnuts
  • Coconut butter
  • Coconut cream (stick a can of full-fat coconut milk in your fridge overnight, pour off the liquid that has risen to the top, whip it up in a bowl with some vanilla and stevia, and you have thick and creamy coconut whipped cream! Perfect for a dessert smoothie). 
  • Dark chocolate shavings (in moderation!).
  • Hazelnuts
  • Hemp hearts (increases satiety, prevents spikes in blood sugar, acts as an anti-inflammatory, improves digestion, and is full of amino acids, Omega-3 fatty acids, and metabolism-regulating Omega-6 fatty acids). 
  • Honey (not for strict vegans).
  • Goji berries
  • Granola (watch out for too much sugar!).
  • Macadamia nuts
  • Nut butters (almond, hazelnut, cashew, peanut butter…).
  • Peanuts
  • Pecans
  • Pistachios
  • Raisins
  • Raw cocoa nibs (a healthier, lower-sugar alternative to chocolate!).
  • Sea salt (just a pinch can create a tasty flavor profile).
  • Sesame seeds
  • Soyatoo (soy-based, canned whipped cream– you can purchase this in the milk section at Whole Foods).
  • Soy nuts
  • Spices (see above)
  • Unsweetened coconut


I just can’t deal with a naked smoothie! As soon as I pour the final product into a big tall glass, I have this incessant need to get all fancy smancy– I MUST make my smoothies pretty after they’re done (hence why my Instagram is filled with #smoothie pics ;) #sorryimnotsorry). Aside from looking lovely and tasting great, many of these toppings have a variety of health benefits that can also boost the health benefits of your beverage. Some of my favorite toppers are hemp hearts, raw cocoa nibs, and unsweetened coconut.


Well. There you have it folks! For all of you who thought smoothies were boring…THINK AGAIN! If these lists don’t get your imagination going, I don’t know what will :) . And don’t be afraid to get a little crazy— after all…that’s where the fun begins! I’d love to see all the creative combinations you come up with, so feel free to tag me on Instagram @prettyfitlife, or use the hashtag #prettyfitlifeHAPPY BLENDING!


.

Healthfully Yours,

.

Ashley Michelle

.


Sources:

Is Carrageenan Safe?

Doubts surface aboutsafety of common food additive, carrageenan

Harvard– Vegetables and Fruits: Get Plenty Every Day

MyPlate Food Groups: Fruits 

8 Healthiest Leafy Greens 

Is Coconut Oil Healthy? 

5 Surprising Health Benefits of Hemp 

Cocoa Powder Health Benefits 

Health Benefits of Cinnamon 

Health Benefits of Cilantro 

Health Benefits of Ginger

Health Benefits of Cayenne Pepper

Health Benefits of Parsley

Health Benefits of Sprouts 

Difference Between Non-Dairy Milks

Easy Vegan Baking Swaps


Photo Credit: dipity.com


x


“Life is uncertain.  Eat dessert first.” Ernestine Ulmer


AHEM! This Ernestine guy had better be talking about healthy dessert! ;)


Okay, so it’s no secret to those of you who know me that I’m a little bit a lot a bit of a health nut :) . I eat clean, I exercise regularly, I avoid GMOs, I take vitamins and I get plenty of Omega 3′s. And while I believe in eating a plant-based diet that limits added sugars, refined carbohydrates, and unhealthy fats, I also understand that we are all human– aka every now and then, you just need a gosh darn slice of cake! A little bit of dessert here and there is perfectly fine, as long as you can successfully include it in your diet. This means DON’T GO OVERBOARD! I find that many people finally get on track with eating well and working out for a few days…only to cave at the sight of something frosted or dripping in chocolate.


Their excuse?

“I’ve been soooo good. I deserve it!”


But can you guess what happens next? They overdo it. I’m not saying that you should cut out sweets 100% of the time, but what I am saying is that you should be mindful of your behavior/mindset around sweets and make healthy choices that will still allow you to stay on track without feeling deprived.


So, what are the keys to healthy dessert eating?


Practice MODERATION and make SUBSTITUTIONS!


I obviously enjoy making desserts (just check out my recipe page), but the trick to most of my recipes is that they’ve been stripped of unhealthy ingredients and swapped out for healthier ones. My line of thought? Healthy or not, dessert is still dessert, BUT if you’re going to enjoy a treat, you might as well make it a little less guilty while still tasting just as sinful ;) . Thankfully stealthy, healthy ingredients are my specialty (in fact, before I settled on the name “Pretty Fit Life” I was actually toying with the name “Stealthy Healthy Chef!”). If I had a dollar for every time someone asked me “You put WHAT in this?!” when I reveal my secret ingredient of choice, well, I’d be rocking a pair of these flashy little numbers on my next girls night out. So I don’t have these sexy shoes, but I do have something just a fabulous (okay, almost as fabulous). And the best part of all? It’s much cheaper than those shoes ;) .


Below, I’ve put together a list of healthy vegan baking swaps so you can “healthify” some of your favorite dessert recipes. This way, you can let yourself indulge every now and then without all the extra guilt and calories. I promise…everything will taste so amazing you won’t even know the difference!


Vegan baking is a cinch with the right ingredients!


Photo Credit: funadvice.com

x


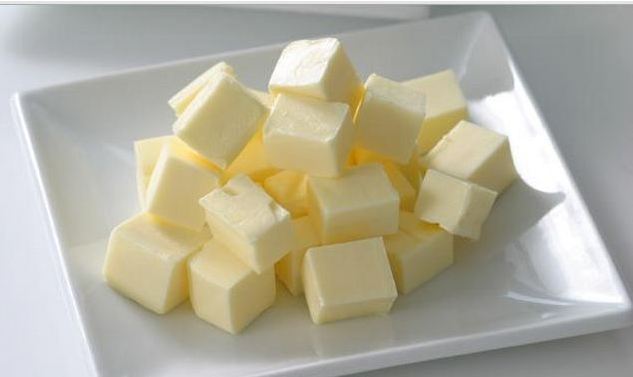
Butter Replacers:

(Fats add flavor, texture, and moisture to baked goods)

  • Olive Oil (spice cookies, cakes, breads)*
  • Sesame Oil (spice cookies, cakes, breads)*
  • Canola Oil (use w/liquid sugars)*
  • Coconut Oil (adds richness, thickness, coconut-y flavor)
  • Vegan Buttery Spread (Earth Balance)
  • Avocado (great for cookies)


 Fat Free Options!

  • Applesauce (all natural, unsweetened)
  • Pumpkin (use the 100% pure, canned kind NOT sugary pumpkin pie filling!)
  • Banana (mashed or banana baby food!)
  • Prunes (pureed or prune baby food!)
  • Peanut butter replacer: Just Good Stuff Powdered Peanut Butter

Note: *1/3 up of oil = 1 stick of butter


Photo Credit: dailymailco.uk

x


Egg Substitutes:

(Eggs are used for moisture/binding/thickening or leavening: identify which of these agents you need & experiment!)*

  • Flax (1T: 3T water= 1 egg)
  • Banana (¼ c. = 1 egg)
  • Applesauce (¼ c. = 1 egg)
  • Canned Squash/Pumpkin (¼ c. = 1 egg)
  • Tofu (silken & firm: ¼ c. = 1 egg)
  • Soy Milk + Lemon Juice (¼ c. soy milk + 1T lemon juice= 1 egg)
  • Soy/Coconut Yogurt (¼ c. yogurt = 1 egg)
  • Cornstarch/Water (1 T cornstarch + 3 T water= 1 egg)
  • Chia Seeds (1T chia seeds + 1T water = 1 egg)
  • Pureed Beans (equal parts can stand in for eggs)
  • Commercial Egg Replacer (Ener-G brand or Bob’s Red Mill- read directions for amounts)
  • Bread crumbs, tomato paste, oatmeal, nut butters (for binding)
  • Baking powder/H2O/Vinegar (1 tsp. baking powder + 1 tsp. water + 1 tsp. vinegar = 1 egg*)
  • Baking Soda/Water (2 tsp. baking soda + 2 T warm water = 1 egg)**
  • Baking Soda/Vinegar (1 tsp. baking soda + 1 T white/apple vinegar= 1 egg)**
  • Lemon Juice + Baking Soda (2 T. lemon juice + 1 tsp baking soda= 1 egg)**

* If the egg is used as a leavening agent in a recipe, you will need to incorporate baking soda and/or baking powder in the recipe for your dessert to rise. Read my notes at the bottom of this post on baking soda and baking powder for leavening instructions.

**Use if this is only leavening agent– do not double up on baking powder/soda!


Photo Credit: topnews.in

x


Milk Replacements:

(amounts = interchangeable)

  • Almond Milk
  • Soy Milk
  • Rice Milk*
  • Coconut Milk (canned and carton)
  • Vegan “Buttermilk”: 1 cup non-dairy milk (above) + 1 tsp. lemon juice or vinegar

*Rice milk tends to be best for soups/sauces as opposed to baking due to it’s low fat content/thin consistency


Photo Credit: ehow.com

x


Flour Substitutes:

(interchangeable aside from exceptions below)

  • Oat Flour
  • Almond Flour*
  • Peanut Flour
  • Millet  Flour
  • Brown Rice Flour
  • Buckwheat flour*
  • Spelt Flour**
  • Coconut Flour*
  • Quinoa Flour*
  • Buckwheat flour*
  • Chickpea Flour*
  • Xanthan Gum/Guar Gum***

*These flours will result in a denser product: mix 1/3 cup of any of these flours with 1 c. millet flour, 1 c. starch, and 1 tsp. xanthan gum for an easy  gluten-free blend. The following are starches for gluten-free baking (potato starch, cornstarch, tapioca starch, & arrowroot)

**Spelt flour is not acceptable for those with Celiac disease

***These stand in for gluten as thickening agents. Xanthan gum is best for baking and is used in batter with high acidity. Guar gum is best for cold foods (pastry fillings, ice cream)


Photo Credit: browningsbakersco.uk

x


Whipped Topping Swap:

(Amounts will vary depending upon your recipe)

  • Coconut Milk Cream (canned, full-fat!)*
  • Cashew Cream (soaked + water )**
  • Soy alternatives (Soyatoo)
  • Tofu Cream (tofu + lemon + powder sugar + flavored extract + flour)***
  • Agar Flakes (agar + water, salt, sweetener, extract)****

* Put a can of full fat coconut milk in the fridge overnight. Turn upside down so liquid comes to top, Turn right-side up, open & drain liquid. With an electric mixer, whip the hardened cream in a bowl with a little sugar & vanilla.

** One c. raw cashews soaked overnight/drained. Blend with 1.5 c. water (add more or less depending upon desired texture), 2-4 T sweetener, dash of salt.

***1 package mori-nu silken tofu, juice from 1 large lemon slice, 1-2 tablespoons powdered sugar,  ¾-1 tsp almond, vanilla, or maple extract, & 3-4 T whole wheat flour (if you’d like it thicker). Whip/blend VERY well.

**** Mix 2 & 2/3 c. non-dairy milk with 2 T agar flakes (boil, simmer 7 minutes, cool, refrigerate until firm). Blend with 3 T water, 1/8 tsp. salt, add a few drops of your choice of flavored extract, and sweeten/flavor to taste–stevia, cocoa powder etc…

Check out more agar recipes here


Photo Credit: thedailymail.com

x


Say Goodbye to Sugar!

(Amounts you use depend upon your own personal sweet tooth preference)

  • Dates (soaked/blended)
  • Bananas (mashed or sliced)
  • Raisins (soaked/blended or whole)
  • Stevia (calorie-free, 300x sweeter than sugar, liquid or powder)
  • Dextrose (a.k.a glucose is 30% less sweet than sugar)*
  • Xylitol (33% fewer calories than table sugar)
  • Coconut Sugar (NEW: low GI, low fructose, natural, high in nutrients)**
  • Molasses**
  • Maple Syrup**
  • Brown Rice Syrup**
  • Honey***
  • Spices, Citrus Zest
  • Nut Extracts (adds an indulgent aroma)
  • Baby Food (banana, prune, plum, apple and other sweet fruits)

*Dextrose= Is a natural sugar found in fruits/starches. The body can readily absorb it & use glucose for energy & to power cells.

** While these are a less processed, natural option, they are still high in calories (Dextrose included). Use sparingly!

*** Honey is not for strict vegans. As mentioned above, use sparingly!


Photo Credit: ifoodx


x

What about Agave?

You may have noticed that agave isn’t on my list of sugar swaps–that’s because there has been a lot of research out there lately that suggests it’s not quite as healthy as you think (you can blame the marketing companies for that). I’ve highlighted some of these recent claims below.

  • 20 calories per teaspoon
  • 1.5 times sweeter than sugar
  • Won’t spike blood sugar (low glycemic index)
  • HIGH in fructose (Agave ranges from 55%-90% fructose–high fructose corn syrup -HFCS- is 55% fructose!)*
  • Chemically processed (similar production to that of HFCS)
  • Doesn’t stimulate/shut off appetite hormones
  • Can lead to overeating, lowered metabolism, & lower insulin sensitivity
  • Raises uric acid levels (chronic low-level inflammation that leads to cardiovascular disease, cancer, stroke, arthritis, early aging)
  • Can decrease HDL levels, increase LDL, contribute to high blood pressure, high blood sugar, elevated triglycerides, fatty liver disease
  • Linked to increase visceral fat  & obesity
  • GI tract doesn’t absorb fructose easily and sends it to your liver (overloads, scars, develops triglycerides)

*Fructose is found in fruit and honey, which is healthy and fine because it is accompanied by fiber, vitamins and minerals – but it is not meant to be consumed in largely concentrated forms like agave.

You can also read more about the dangers of agave here


Photo Credit: pfdcast.net

x


Vegan Baking Tips and Tricks: Baking Soda vs. Baking Powder:

(These are chemical leaveners used to make baked goods.What you use depends on other ingredients)

Baking Soda = Best for cookies

  • When baking soda (100% sodium bicarbonate) is combined with an acidic ingredient (vinegar, lemon juice, chocolate, molasses, yogurt) CO2 is released, thus forming bubbles in the batter.
  • When heated, these bubbles expand and cause the finished product to lighten/rise (& give baked goods a nice brown color!)
  • Recipes with baking soda must be baked immediately or they will fall flat!
  • Baking soda can be mixed with some cornstarch and cream of tartar to replace baking powder.
  • Baking soda will leave a bitter taste unless counteracted by an acid.
 

Baking Powder = Best for cakes and biscuits

  • Baking Powder (sodium bicarbonate + cream of tartar + starch) contains an acid and a base and has a neutral taste.
  • Available in single-acting (which must be cooked immediately) or double-acting formulas (which can stand at room temperature for a bit).
  • Baking powder cannot replace baking soda because it already contains an acid (cream of tartar).

(Powder & soda might both be used because you may have enough soda to neutralize acidic batter, but not to lift batter. A little baking powder can do this job. If you use just baking powder however, it could be too acidic. Both together also give the batter a bit of a tangy taste—good for cookies!)


Hopefully you’ve discovered some surprising new ingredients from my lists above, and I hope I’ve inspired you to get a little crazy and experiment the next time you’re in the kitchen. Remember, eating healthy doesn’t mean eating bland or depriving yourself. It just means you need be smart and you need to be willing to get a little more creative with your cooking :) .

Photo Credit: cupcakestakethecake


x 

Staying on track with your healthy diet while still being able to indulge in sweets?

x

Now THAT’S what I call having your cake and eating it too ;) .


x

Healthfully Yours,

x

Ashley Michelle


x


Soft & Chewy Cinnamon Spice Cookies (Gluten-Free!)

x

Put away those beachy flip-flops and bring on the boots!

x

It’s time for apple picking and winery tours and scarves and blazers…

x

After all, it’s almost FALL :)

x


Okay, okay. I know it’s technically still summer (and you can most certainly get in a few more beach weekends before it’s all said and done) but you have to admit… September snuck up on us  just a tad quicker than usual this year.

x

And I’m going to be very honest.

x

I still don’t know quite how to handle the changing of the seasons without expecting some sort of major life transition to go right along with it. I mean, this will be my third fall not going back to college…

x

My third.

x

Holy smokes I am OLD.

x

And yet, three years later, I still feel like I should be making those infamous trips to Target, packing up the car with oversized storage bins, and buying fluffy pink decor to pretty-fy my generic, empty apartment shared by four 20-something year old girls.

x

Now, instead, I’m making weekly trips to the grocery store, packing a well-balanced lunch for work everyday, and running to Homegoods and Bed Bath and Beyond in an attempt to purchase sophisticated decor and grown-up-ify my simple, one bedroom apartment–which I now share with a boy.

x

Oh how the times have changed…(even though I do still miss those pink fluffy pillows :) )

x

Still, there’s something pretty darn nice about not having to spend the weekend in the library or pulling all-nighters studying for exams. That leaves me plenty of time for vegan recipe testing, tasting, and blogging.

x

Oh yeah…

And working full-time means I can now afford wine that comes in a bottle instead of a box ;)

x

Bonus!


Other fall traditions to look forward to?

  1. Football (GO PATS!)
  2. Cinnamon-inspired baking
  3. Nashoba Valley Blueberry wine (Seriously. This stuff is heavenly)
  4. A very hungry, football-watching boyfriend (aka professional taste-tester)

x

x

But the BEST part of all about the impending fall season…?

x

x

x

I can get a litttttle recipe crazy :)

x

x

x

And thank goodness I do.

Or I wouldn’t have whipped up these little buggers!

x

(Ahem. I mean…healthy, fiber-rich, protein-filled, and gluten-free little buggers at that!)

x


Soft & Chewy Cinnamon Spice Cookies

x

x

Ingredients:

  • 1 can garbanzo beans
  • 1 cup of whole grain oats (blended to a powder)
  • 1/3 cup of pumpkin puree (not pumpkin pie filling…100% pumpkin!)
  • 3 packets of stevia
  • 2 tablespoons of unsweetened almond milk
  • 1-2 tablespoons of coconut oil
  • 1 tablespoon plus 1 teaspoon of cinnamon
  • 1/4 cup of brown sugar (you could try to cut this amount in half and increase amount of stevia, or,  omit altogether– just be sure to add 1-2 more tablespoons of almond milk or the batter will be too thick. You could probably use dates instead of sugar to make this 100% sugar-free, however, the consistency may be a bit chewy).
  • 1 teaspoon of pure vanilla extract
  • 1 teaspoon of baking powder
  • Slightly under 1/2 teaspoon of baking soda
  • Dash of salt

x


Directions: 

(Makes roughly 15-20 cookies depending upon whether you want baby cookies or bigger cookies…or eat half the batter like me ;) )

**Be sure to use a VERY good food processor or a blender like a Magic Bullet or Nutribullet–you may have to split into batches if you choose the blender option, however**

x

x

x

  • Preheat the oven to 350º
  • Blend the garbanzo beans, pumpkin, milk, vanilla, and oil until smooth.
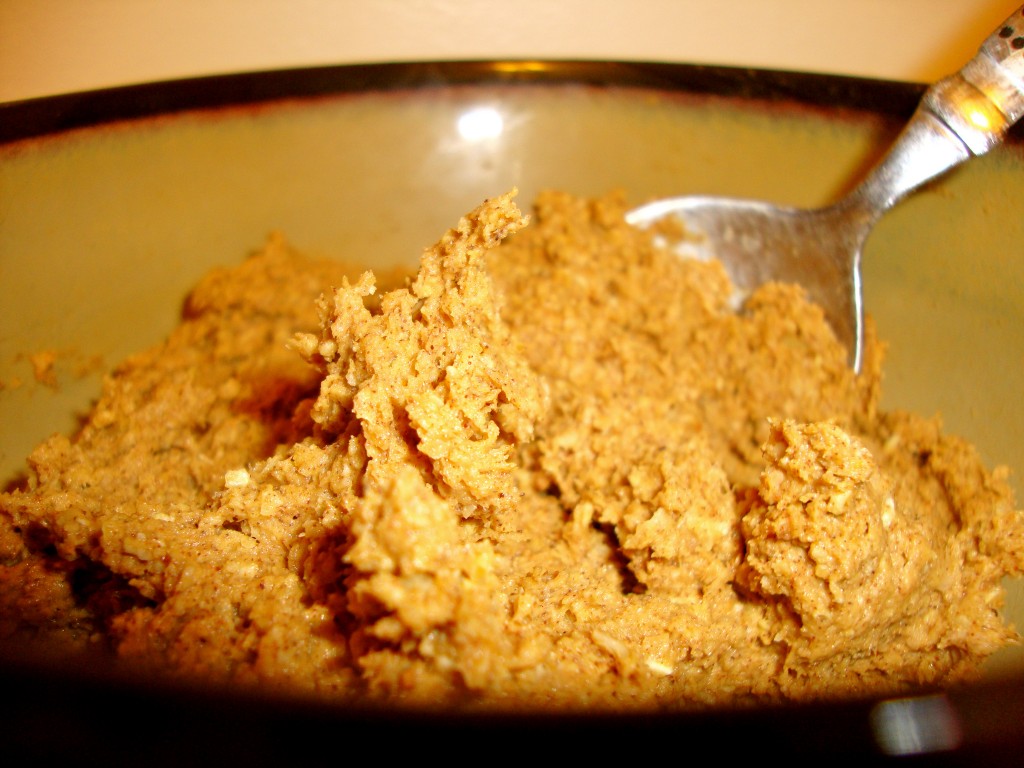
  • Add the rest of the ingredients to the bean mixture and blend VERY well (the mixture will be sticky)
  • Spray a cookie sheet with all-natural, non-stick cooking spray and form the dough into balls.
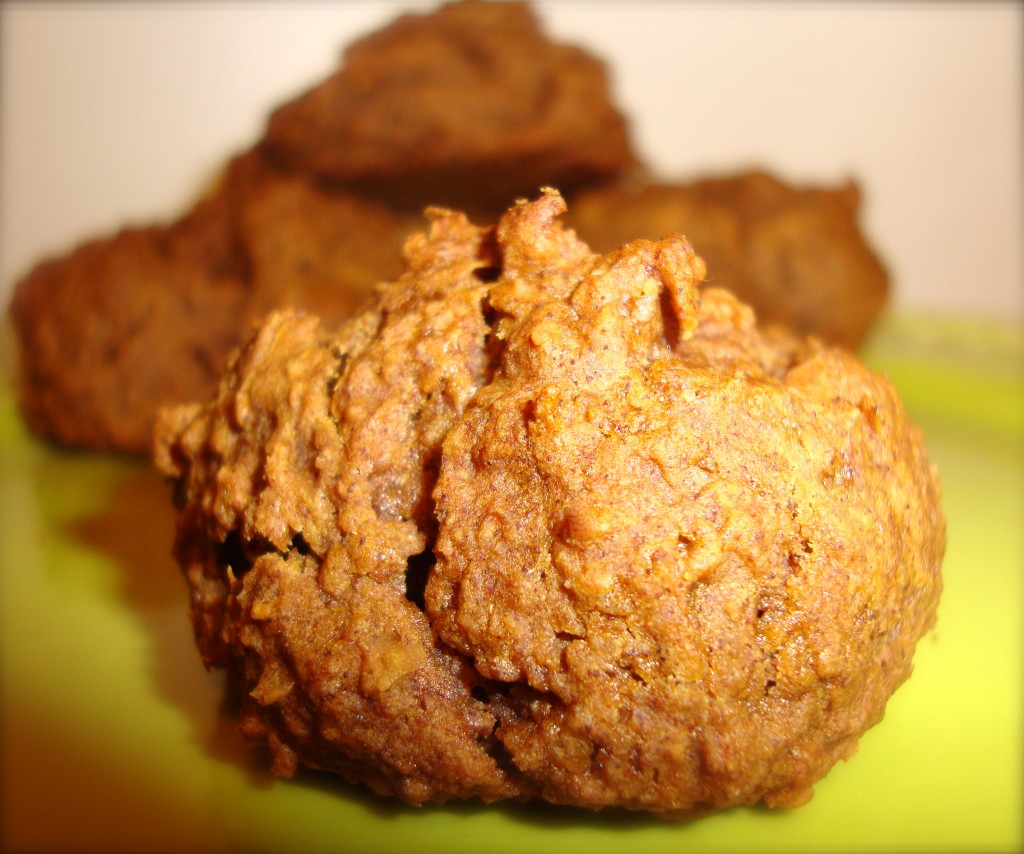
  • Cook for 16-18 minutes (or until tops start to brown).
x
I know you are obviously running off to the kitchen to make these yummy cookies right about, well,  NOW…so don’t worry–I won’t bore you with all the dirty details about the health benefits of these cookies’ ingredients. However, you can read all about the health benefits of cinnamon and pumpkin here while your waiting for your treats to come out of the oven ;)

x

x

And when they do…

x

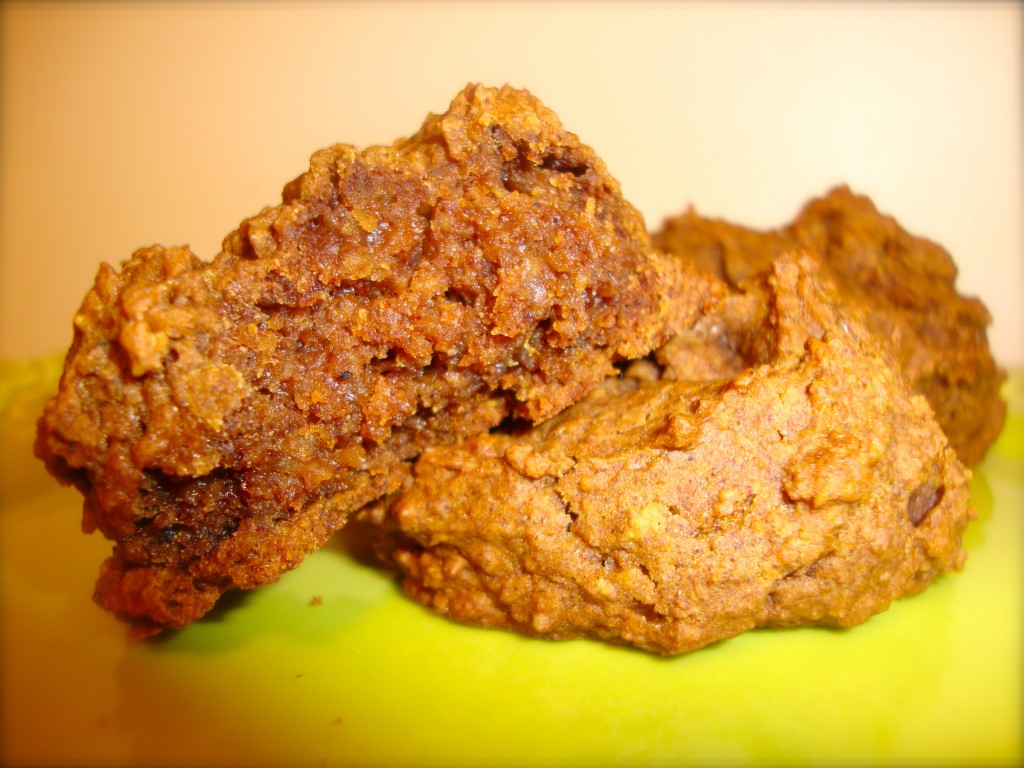
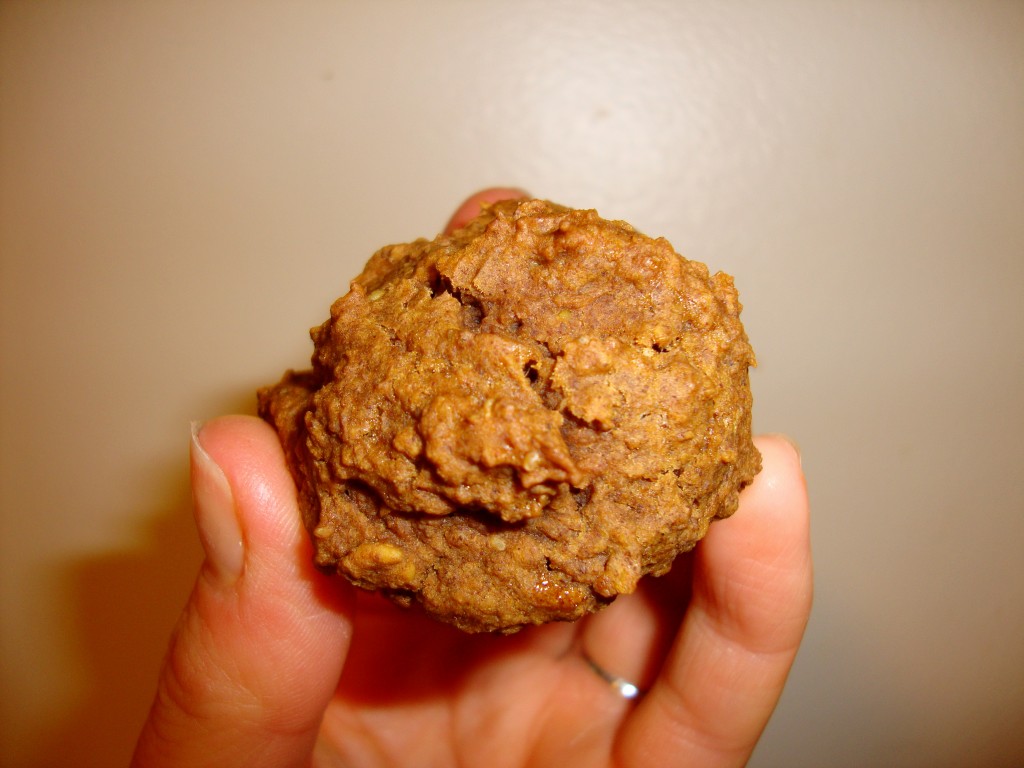
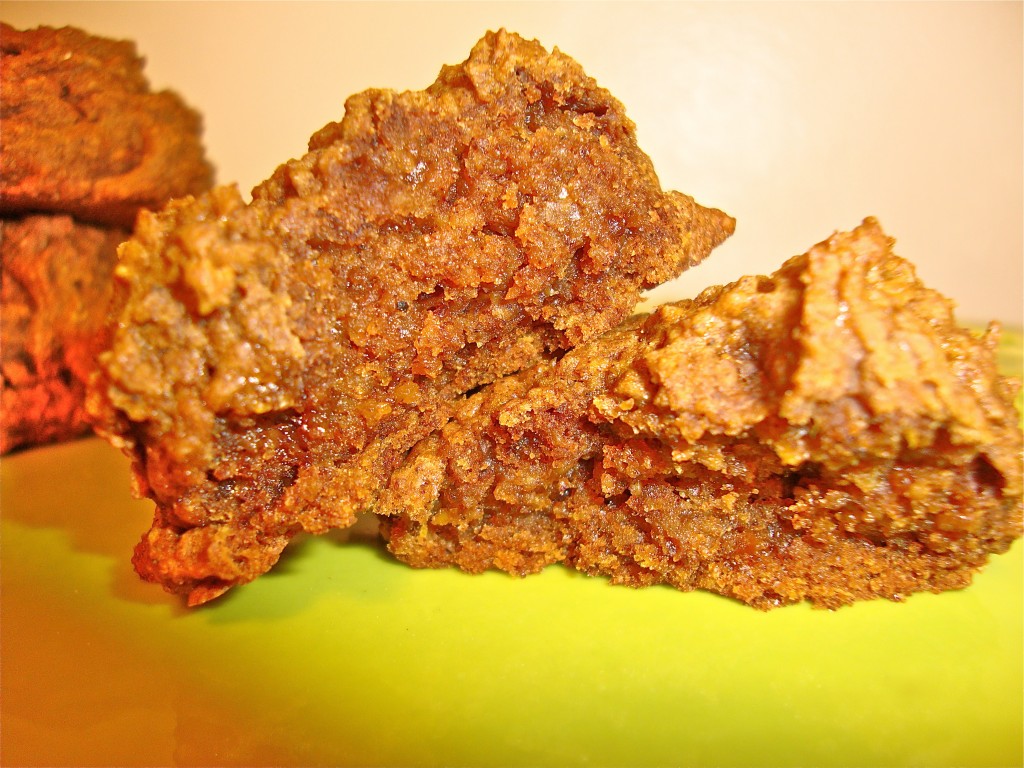
they’ll look like THIS.

x
x

x

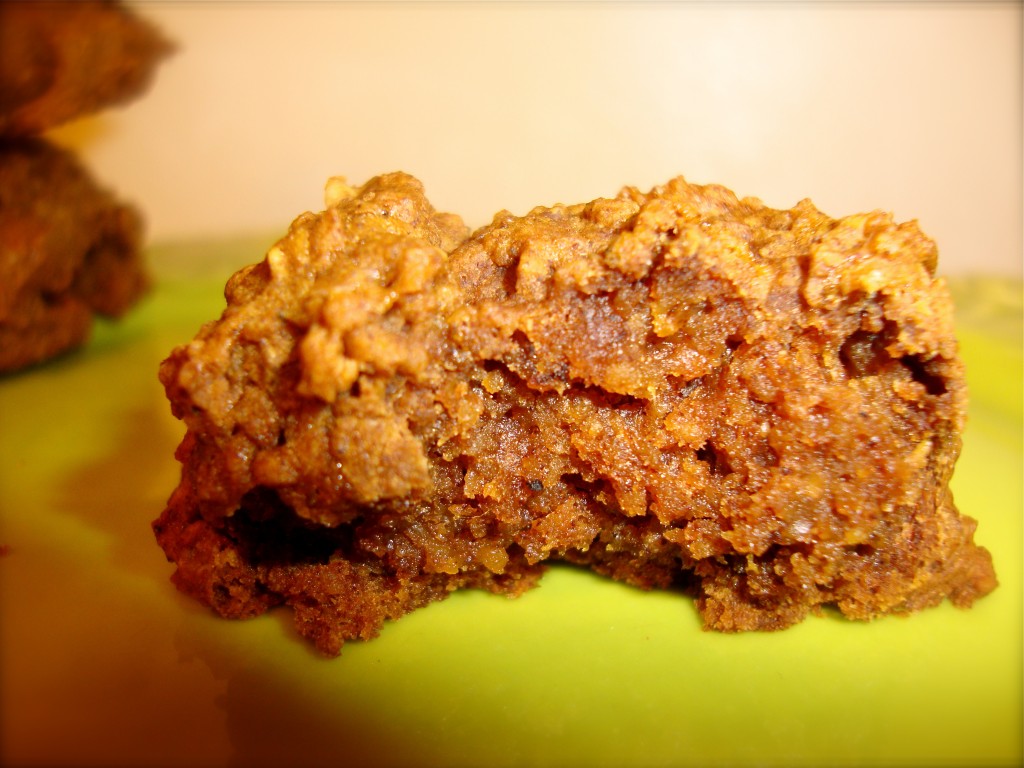
So soft and chewy on the inside…

x


x


I DARE you to not take a bite… ;)

x

x

Healthfully yours,

x

Ashley Michelle


Skinny-fied Double Chocolate Cake

x

Calling all chocoholics!

x

Hey! I’m talking to YOU!

x

I have a very important announcement to make…

Chocolate CAN be good for you!

x

Now, before you go all kinds of crazy on me and make a bee-line to your kitchen cabinet for that leftover bag of chocolate chips (and don’t act  like you don’t sneak a few handfuls of chocolate chips every now and then ;) ) allow me to explain.

x

When I say chocolate is healthy, I’m not talking about chocolate bars, ice cream, brownies, and cake…

x

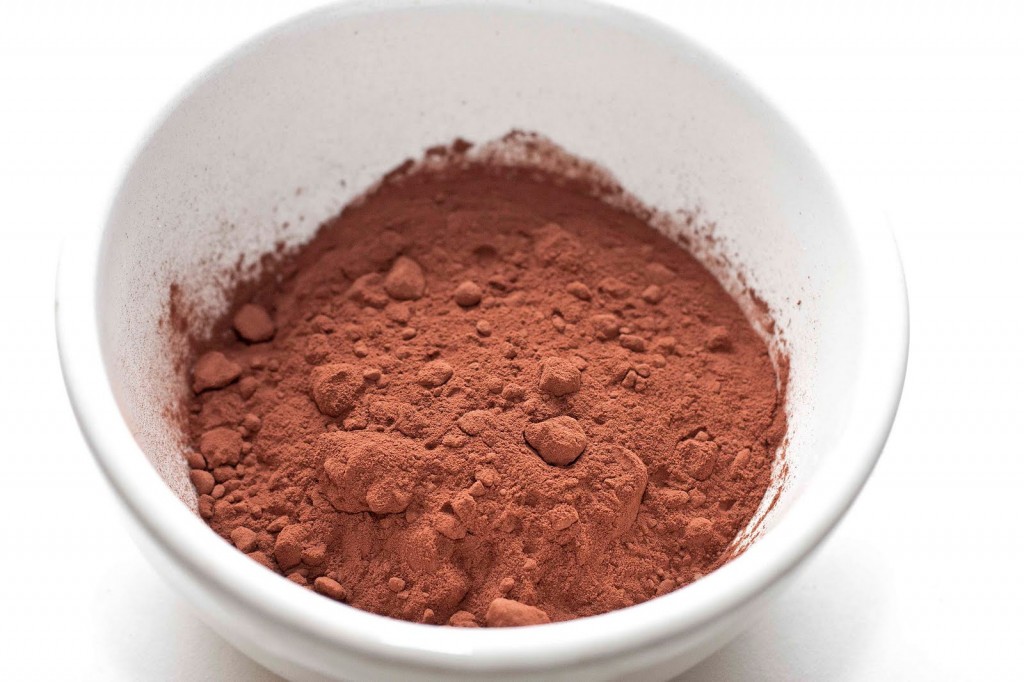
I’m talking about UNSWEETENED, UNPROCESSED, NATURAL cocoa powder.


Photo credit: http://www.veganbeautyreview.com

x

Cocoa is the brownish-colored powder left behind after cocoa butter has been completely removed from cocoa beans. Cocoa powder is also most popularly used for baking. You will find cocoa powder sold in stores in two different forms–natural and alkalized (also known as Dutch-processed).  Natural, unprocessed cocoa powder is a light brown color and has not had anything added to the cocoa beans while being pressed. Alkalized cocoa powder is dark (almost reddish) in color and is much less bitter than natural cocoa powder. While this kind of cocoa is often alkalized to reduce its acidity and improve the taste, it’s best to buy the natural kind. The alkalizing process significantly reduces the beneficial amounts of healthy phenols and antioxidants present in the cocoa powder (an example of alkalized cocoa powder would be Hersey’s cocoa powder).

x

Antioxidants and phenols??

SURPRISE!

I bet you didn’t know this guy was full of healthy, cocoa-y GOODNESS! ;)

x

x

It’s true! Cocoa powder packs some serious health-related benefits. In fact, its nutritional benefits are significant enough that they’ve been gaining a bevy of recognition from doctors, researchers, and dietitians alike–particularly in regards to cardiovascular and weight management advantages.

x

YES. Cocoa powder is DIET-FRIENDLY! 

Just one tablespoon has 20 calories, 0.5 grams of fat, no added sugar, and 3 grams of carbohydrates–two grams of which are fiber. But that’s not all! Read below to check out all the other great benefits of this delicious ingredient.

x

Health Benefits of Cocoa Powder:

  • LOW FAT (0.5 grams in 1 tablespoon!)
  • Sugar FREE!
  • Just 20 calories in 1 tablespoon.
  • High in fiber (2 grams per 1 tablespoon).
  • Diabetes-friendly (no sugar).
  • Contains trace vitamins and minerals like B-vitamins, magnesium, phosphorous, iron, and zinc 
  • Contains 10% of the daily required intake of manganese and copper.
  • Rich in heart-healthy sterols and free-radical fighting antioxidants (most notably the antioxidant Flavan-3-ol).
  • Contains more antioxidants than both green tea and red wine!
  • Improves blood flow, which increases cognitive ability, lowers high blood pressure, reduces the risk of blood clots, decreases stress, and improves skin complexion.
  • The presence of Phytosterols (also known as plant sterols) reduces cholesterol and improves heart health.
  • Supports the immune system.
  • Boosts mood due to the presence of phenethylamine (a neurotransmitter that acts as a natural antidepressant) and due to the subsequent release of serotonin following consumption.


But you know what the BEST benefit of all is???

Chocolate is SO DARN DELICIOUS!


And seeing as cocoa powder is already chock-full of health benefits, tossing it into a slimmed-up dessert is the perfect recipe for a completely delectable, yet totally guilt-free indulgence.

x

Skinny-fied Double Chocolate Cake

(This recipe serves up a monster piece of cake for one, or can be cut in half and shared with a friend!)


Dry ingredients:

  • 1/3 cup spelt flour (whole wheat flour will work to– but the cake may not be as light and fluffy).
  • 2 tablespoons unsweetened, unprocessed, natural cocoa (I like the Trader Joe’s brand, but you can also find it at Whole Foods and online).
  • Slightly under 1/2 teaspoon baking powder.
  • 2-3 packets stevia (or 2 tablespoons organic, all-natural sugar or 3 teaspoons Truvia– feel free to play around with the amount depending upon how much of a sweet tooth you have).
Wet Ingredients:
  • 1/4 cup plus 1 tablespoon almond milk.
  • 1 teaspoon natural vanilla extract.
  • 1 teaspoon coconut oil.
Directions:
  • Preheat the oven to 330º.
  • Mix all the dry ingredients in a bowl. Set aside.
  • Add all the wet ingredients into a separate bowl. Warm the mixture in the microwave for 15 seconds (until coconut oil is melted).
  • Combine the wet and dry ingredients, mixing just until smooth (do not over-mix).
  • Pour into a small baking dish (sprayed with all-natural cooking spray). I use this one from Pier 1 Imports.
  • Bake for 19-20 minutes (until the top of the cake begins to crack).
  • Once cooled, pop out of the baking dish and cut in half.
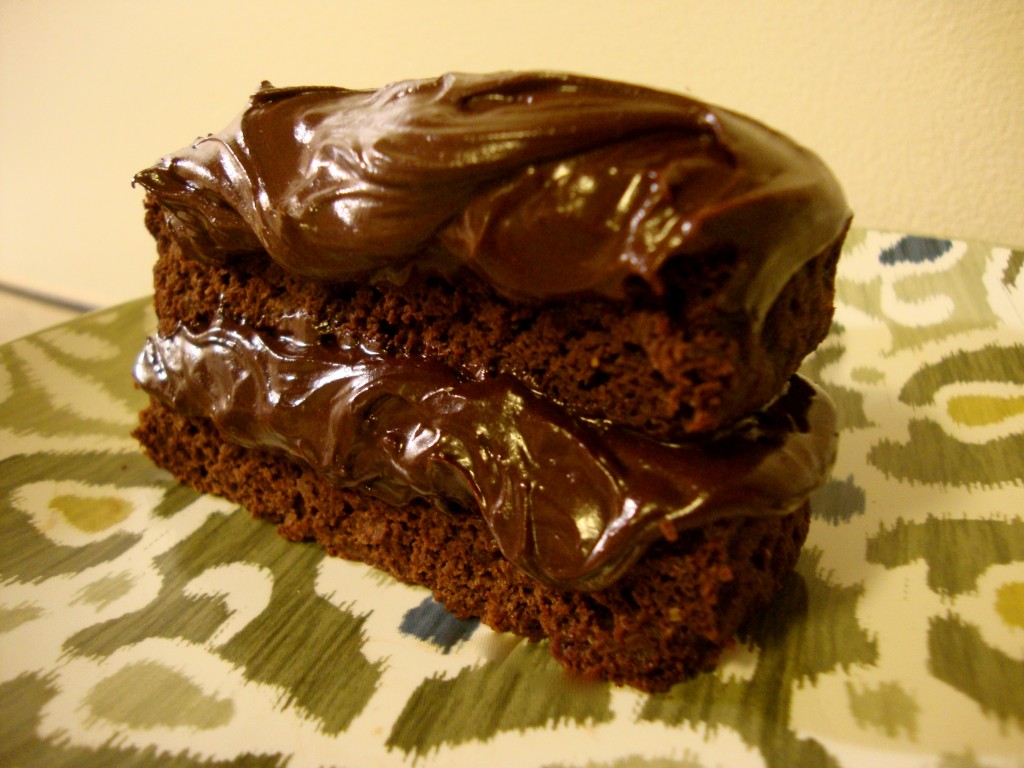
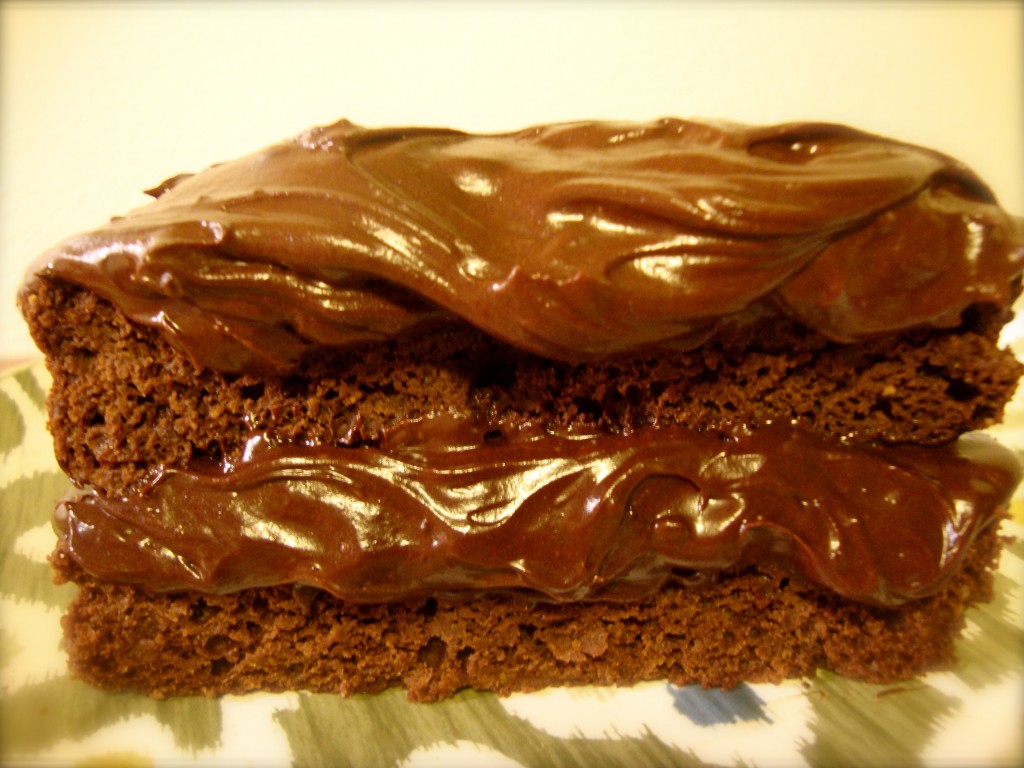
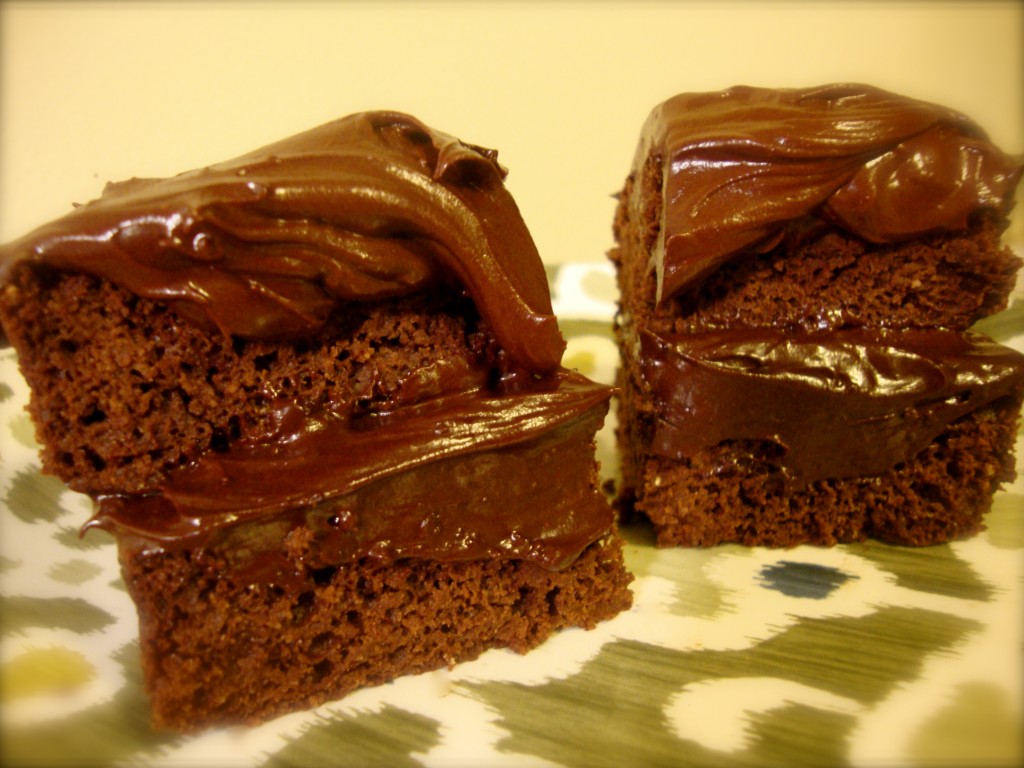
  • Slather in fudgy frosting on top and in between the two halves of cake to make a sandwich! (See below for my fudgy frosting recipe).

x

Fudgy Frosting

(makes 1 very large “frosting-lovers” serving or 2 regular-sized frosting servings)
  • 1/2 cup all-natural, organic powdered sugar.
  • 1 tablespoon plus 1 teaspoon of all-natural cocoa powder (you can find this at Trader Joe’s, Whole Foods, and online. Feel free to add more cocoa if you like dark chocolate frosting!)
  • 3 teaspoons of unsweetened almond milk.
  • 1 and 1/2 teaspoons Earth Balance Buttery Spread (at room temperature).
  • Optional: 1/4 teaspoon almond extract.
Directions:
  • Mix all the ingredients in a small bowl until smooth.
  • Spread allllll over your cake (that is, if you have any left after taste-testing straight from the bowl!)
 x

x

Now THAT’S what I call having your cake & eating it too ;)


Let’s Chat!

Are you a chocolate or a vanilla person? I’ve ALWAYS been a vanilla-girl at heart. In fact…I used to HATE chocolate! Yes, it’s true! The strange thing is, I’ve found I’m actually starting to like  (love?) chocolate more and more lately. I guess your taste-buds can change with age after all :)

x

x

Healthfully yours,


Ashley Michelle


x

Sources:

Livestrong: Benefits of Cocoa Powder 

Livestrong: Is Cocoa Powder Healthy?


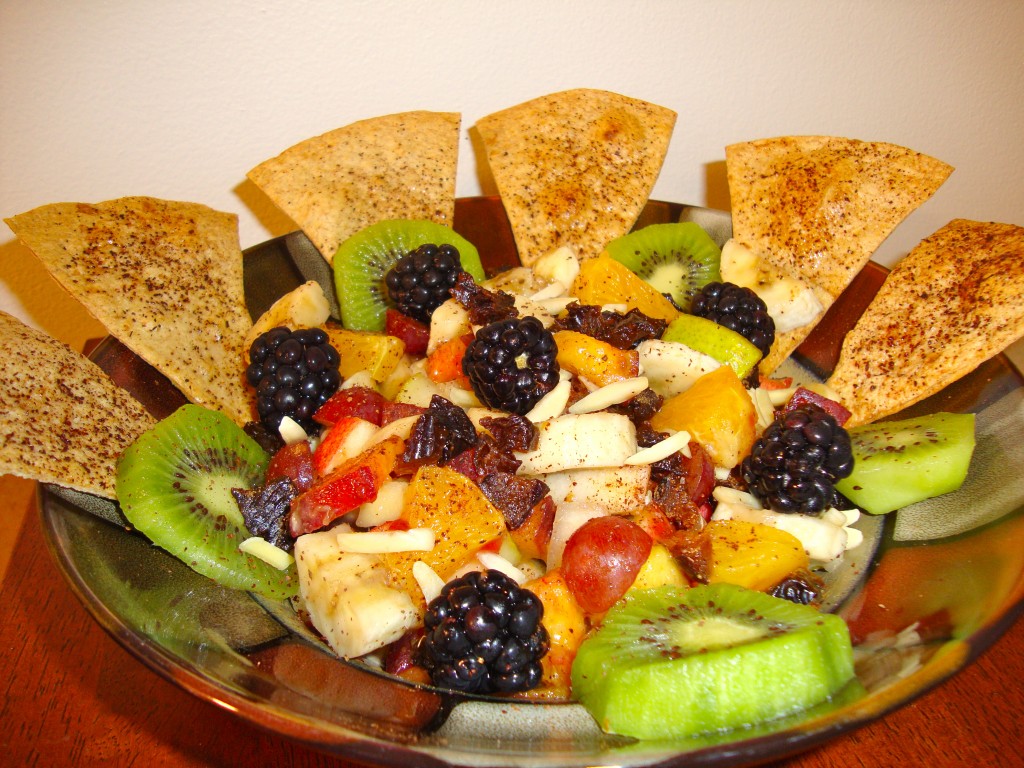
Fruity Tutti Fruit Bowl (with Cinnamon Chips!)

x

I have a VERY bad habit.

A fruity habit that is.

And I think I mayyy need some help…

 x

You see, whenever I go into a grocery store, I just CAN’T control myself. As soon as those shiny, rainbow-colored displays of fruit greet me at the door I’m toast. No matter what I do, a simple shopping trip to pick up a few apples and bananas to last me through the week ends up turning into a full-out FRUIT-FEST.

x

Wait…does that make me a FRUIT-A-HOLIC??

x

Regardless, this weekend in particular was a bit out of control–even for me (It honestly would have made more sense to ask me what kind of fruit I didn’t have in the house than to ask me what kind I did have).  When I woke up this morning, I took one long look at my fruit bowl and knew I needed to do something about this fruit situation before everything spoiled. Either that, or I was going to have to open up my apartment to the public and become a farmer’s market for the day! But something tells me I don’t think my landlord would like that…

x

So, what’s a girl to do with all this fruit?

FRUIT SALAD, obviously!

x

As soon as the hot summer months come around, I rarely use the stove to cook meals. Instead, I choose to eat fresh, cool, and raw dishes as a way to beat the heat. One of my favorite summertime staples falling under these categories has always been fruit salad. I could honestly eat it for breakfast, as a snack, and even for dessert for the rest of my life and be perfectly satisfied. Not only is fruit salad healthy (Antioxidants! Fiber! Vitamin C!) but it’s easy to toss together and it’s a bright, pretty dish to bring along to summer parties or cookouts.

For this recipe, I decided to take a classic fruit salad and spice it up a bit. When it comes to fruit salad, I like to try to hit all the colors of the rainbow because, well, it’s pretty and girly :) but you certainly don’t have to. This recipe is 100% customizable, so don’t worry if you don’t have all the ingredients–you can totally go all improv and create your own masterpiece!

x

There’s only one thing left to do.

x

x

Start choppin’!

 x

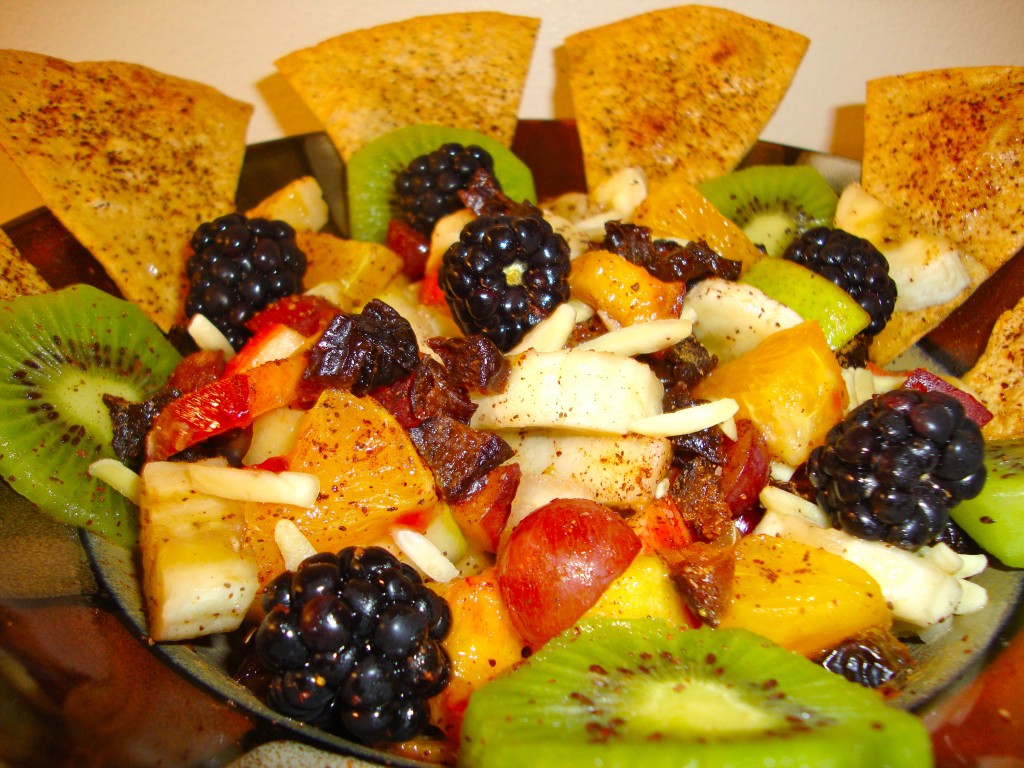
Fruity Tutti Fruit Bowl

Ingredients:

  • 1 apple (fuji apples are my absolute favorite!)
  • 1 whole orange
  • 1 large banana
  • 1 pear (I like d’anjou, but any kind will do)
  • 1 peach
  • 1 kiwi
  • 1/2 cup grapes (sliced)
  • 1/2 cup blackberries
  • 3 teaspoons of all-natural, vegan, jam (I like Trader Joe’s reduced-sugar jams. They make it in blueberry, strawberry, raspberry, apricot. I couldn’t pick so I used half apricot and half strawberry for this recipe :) )
  • Plum Amazins (for sprinkling)–they are a great alternative to raisins, plus, they’re lower in calories!)
  • Sliced almonds (for sprinkling)
  • Cinnamon (for sprinkling)–cinnamon is a great addition to any diet because it helps control blood sugar spikes and is very high in antioxidants. It’s also anti-microbial, has anti-clotting features, boosts brain function, and promotes colon and heart health because it has fiber, manganese, and calcium in it.  I put it on EVERYTHING!)
x
Directions:
  • Chop everything up and place the fruit in a large bowl (leave the kiwis, almonds, and plum bits aside for garnish).
  • Mix in the jam and cinnamon (I personally put a TON of cinnamon in this recipe, but I tend to like things over-spiced. Feel free to spice it up or down as much as you’d like).
  • Sprinkle almonds and plum bits on top. Arrange the kiwis around the bowl.
x

Don’t forget the Cinnamon Chips!

x

x

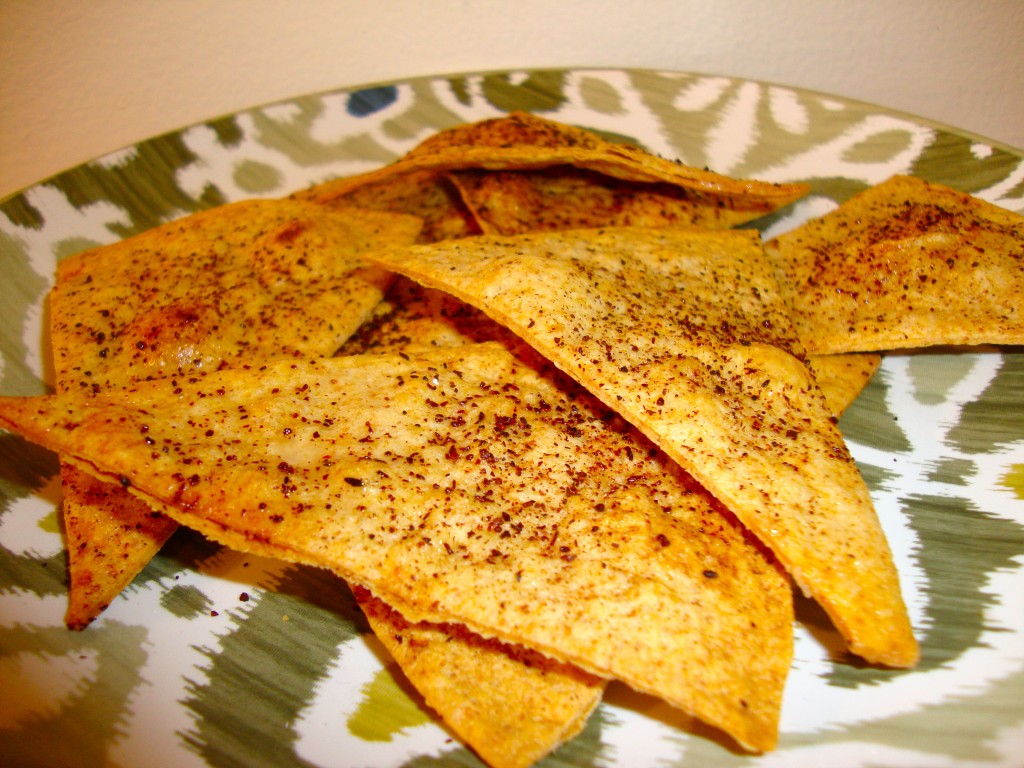
Cinnamon Chips:

Ingredients:

  • 2 whole wheat tortillas
  • Cinnamon
  • Stevia or all-natural, organic sugar
  • All-natural cooking spray
Directions:
  • Preheat the oven to 350º
  • Slice the tortillas into triangle shapes
  • Place the tortilla triangles on a baking sheet and lightly spray with all-natural cooking spray.
  • Sprinkle lightly with cinnamon and stevia (or sugar).
  • Bake for 11 minutes.
  • Once cooled, arrange around the fruit bowl for an adorable presentation!
  • Eat the chips on their own, or use the chips to scoop up some of the fruit for my take on a dessert salsa!
x

See, sometimes its okay to be fruity! ;)

x

Healthfully Yours,
Ashley Michelle
x
Sources:


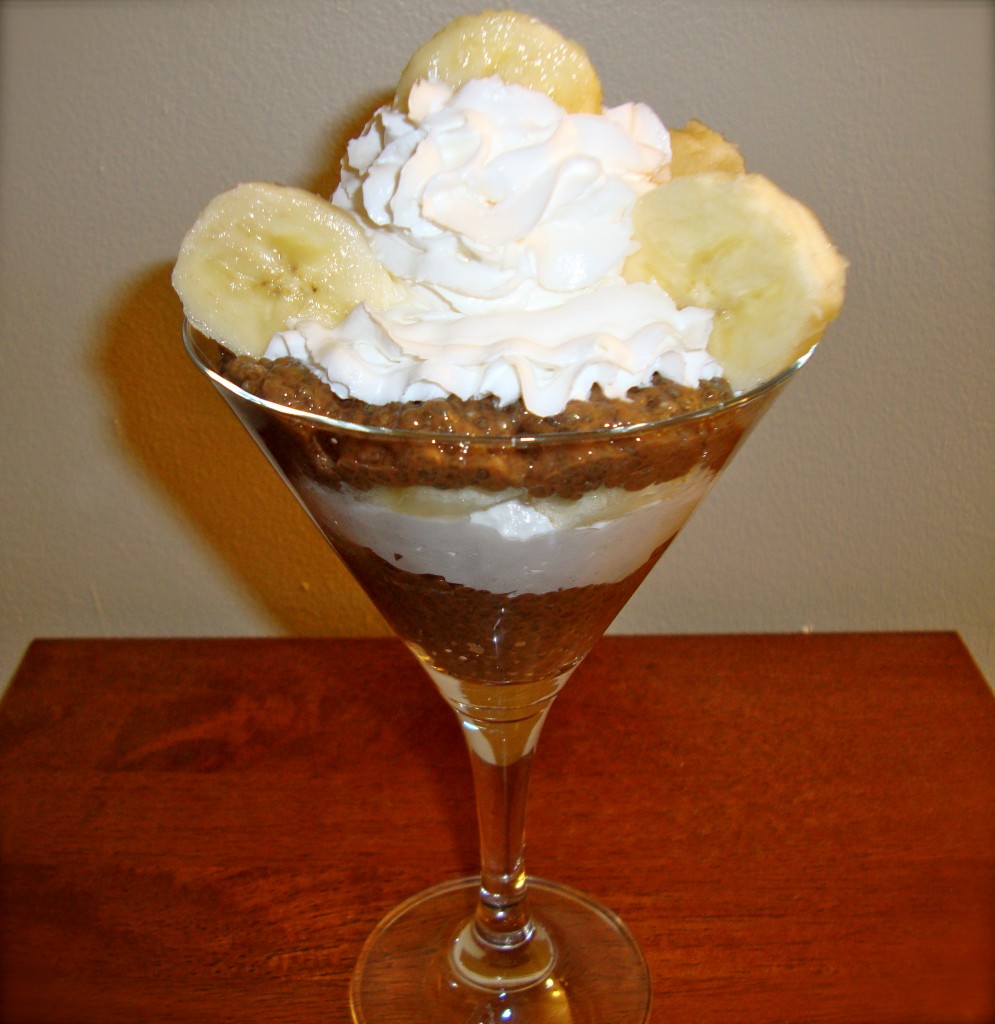
Cha Cha Chocolate-Hazelnut Chia Pudding

x

Ch-Ch-Ch- CHIA!

x

I bet you didn’t know that the same little seeds sprouting from your chia pet are actually MAGICAL seeds…

x

Don’t laugh.

It’s true! (Plus they make a heck of a dessert…did you see above?).

Chia seeds are chock full of amazing health benefits. And that’s exactly why they have been a SECRET SUPER-FOOD primarily known among the health and fitness savvy for years…

UNTIL NOW!

These little miracle seeds are finally becoming more mainstream now that health conscious people everywhere have discovered their fabulous health benefits…but what is it exactly that makes chia seeds so unique?


Well, I’ll tell you!

But first off, let’s start with a brief history lesson :) .

x

Photo Credit: www.christinacooks.com

Native to Guatemala and both the southern and central parts of Mexico, chia (Salvia Hispanica) is a flowering plant that belongs to the mint family. The chia plant is harvested for its highly nutritious, multi-colored, and speckled seeds. Evidence suggests that these seeds were used as far back at 3500 BC! Before the Spanish Conquest of Latin America began in 1519, chia seeds were a vital crop and food source for the Aztecs and Mayans because of their incredible stamina and energy-providing abilities. In fact, it is believed that Aztec and Mayan warriors and runners were able to sustain themselves on just a handful of these little seeds a day! It is quite fitting, then, that the name ‘chia’ is derived from the Mayan word for ‘strength’.

The Aztec and Mayan civilizations regularly consumed chia seeds either on their own, by grinding them into flour, drinking them mixed with water, or pressing them for their oil. Unfortunately, after the Spanish Conquest of Latin America, chia plants disappeared for about 500 years. This was because the Spanish settlers prevented the practice of any native traditions, including the farming of native crops. Instead, the Spanish used the natives’ land to harvest their own crops (namely barley and wheat). However, some chia plants did survive as a minor crop in Guatemala, Mexico and Nicaragua– and now, years later, THEY’RE BACK!

X

Health Benefits of Chia Seeds:

  • They deliver the maximum amount of nutrients with the least amount of calories.
  • Chia seeds have 2x the protein of any seed or grain.
  • They have 3x as much iron as spinach.
  • Chia seeds increase stamina and energy over long periods of time (they are becoming a favorite among marathon runners!)
  • They can aid in weight loss (chia seeds absorb up to 7x its weight, and expand to curb appetite/make you feel full).
  • They are rich in alpha-linolenic acid, also known as ALA.
  • Chia seeds can reduce overall cholesterol and increase good cholesterol (HDL)
  • They are heart-healthy in that they have one of the most concentrated sources of Omega-3 than in any other food (even salmon).
  • They also contain high amounts of Omega-6 (both Omega-3 fatty acids and Omega-6 fatty acids cannot be made internally and must be obtained through diet).
  • They contain the essential minerals such as sodiumphosphoruspotassium (2x as much as bananas), manganese, and calcium (5x more than in milk!).
  • They are FULL of antioxidants (3x as much as blueberries!).
  • Chia seeds have 11 grams of dietary fiber in one ounce (the soluble fiber improves digestion and helps to reduce glycemic spikes)
  • They do not need to be ground like flax seeds in order to reap their benefits.
  • Chia seeds have a long shelf life and do not spoil as quickly as other seeds (like flax-seed).
  • They soothe heartburn and calm the digestive system due to the gel-like substance they form when mixed with a liquid (this is especially helpful for people with IBS).
  • Chia can relieve itchy skin (in oil form)
  • They can help to balance blood sugar/prevent glucose spikes

X

But the BEST part of all? You can use chia seeds to make a DELICIOUS and HEALTHY DESSERT!

 x

When chia seeds are soaked in water and sit for about 20 minutes, they form a jelly-like substance. The soaked chia is perfect to use as an egg-replacement (1 tablespoon chia seeds + 3 tablespoons water), as a drink (chia fresca), or (my personal favorite!) as a PUDDING! (You can also toss chia seeds on salads, in protein shakes, mixed into yogurt, or on their own. There aren’t any rules. Go crazy!).

While the texture may be hard to get used to at first, I promise you…the health benefits of chia seeds are worth it! This pudding recipe below is a guilt-free option for a healthy dessert or snack, and even better…it’s delicious!

x

Chocolate-Hazelnut Chia Pudding

Ingredients:

  • 3/4 cup unsweetened almond milk (I use the unsweetened version of Vanilla Almond Breeze)
  • 1/4 cup chia seeds (I have seen chia seeds at Trader Joe’s, Whole Foods, and Shaw’s…but I bet you can get them at most grocery stores nowadays).
  • 1 tablespoon of all-natural cocoa powder (feel free to add more if you want it extra chocolate-y!)
  • 2 packets of stevia (or 2 teaspoons of another all-natural sweetener)
  • 1/2 teaspoon of all-natural hazelnut extract (You can find this at Whole Foods or online, but vanilla, almond or maple extract would also do–just reduce the almond extract by half…it’s quite strong!)

Directions:

  • Pour the chia seeds in a bowl.
  • Mix the almond milk, cocoa powder, hazelnut extract, and stevia in a blender.
  • Pour the mixture over the chia seeds– stir for a few seconds–let it sit for at least 20 minutes (do not mix while the seeds are soaking).
  • After the 20 minutes are up the seeds should have absorbed all the liquid (if not, soak a little longer) and have a jelly-like texture. The pudding will get even thicker if you let it sit in the fridge for an hour or so.
  • Mix very well and serve cold.

x

If you want, feel free to fanci-fy your chia pudding like me! You can layer it with any fruit you’d like (strawberries anyone?) and Soyatoo vegan whipped cream to make a trifle-like dessert. Anyone on the Scottish side of my family know how much I LOVED trifle as a little girl :).

x

Hmm. That gives me an idea…

I just may need to create a vegan version of my favorite childhood dessert very soon…

 x

Healthfully yours,

Ashley Michelle


Sources:

What are chia seeds

Livestrong: The benefits of chia seeds

Livestrong: Medicinal healing properties of chia seeds

Powerful health benefits of chia seeds

Chia seed profile

The superfood that could change your body

The miraculous running food

Dr. Oz: Ancient super secret

Three cheers for chia!

Chia questions and answers


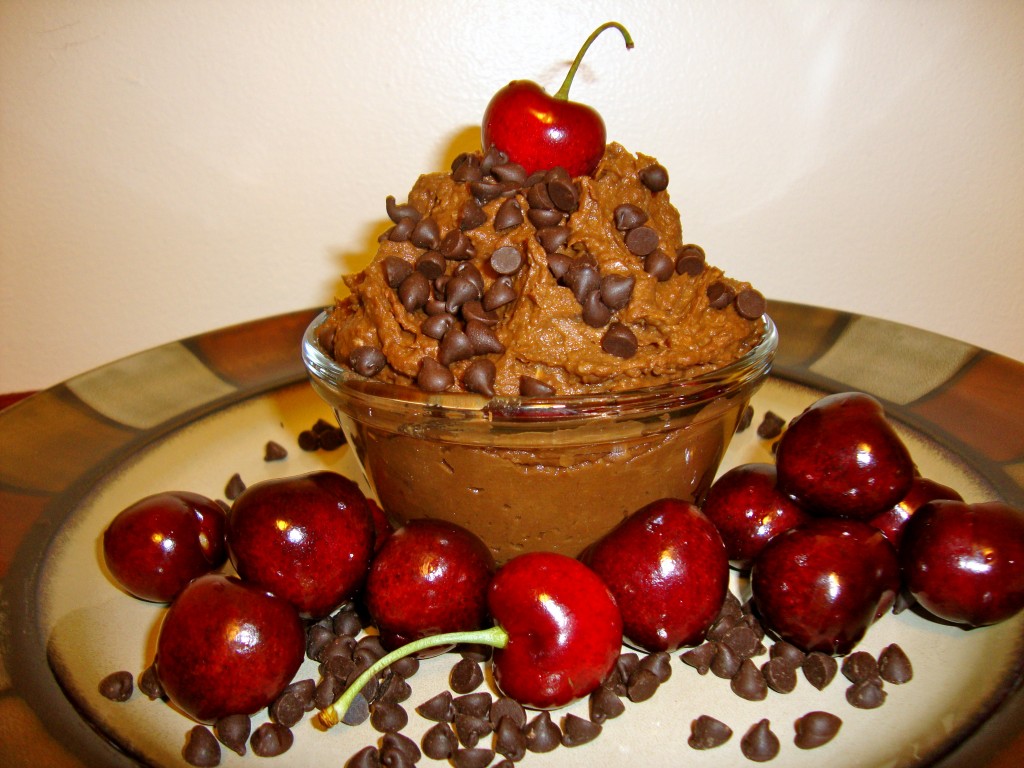
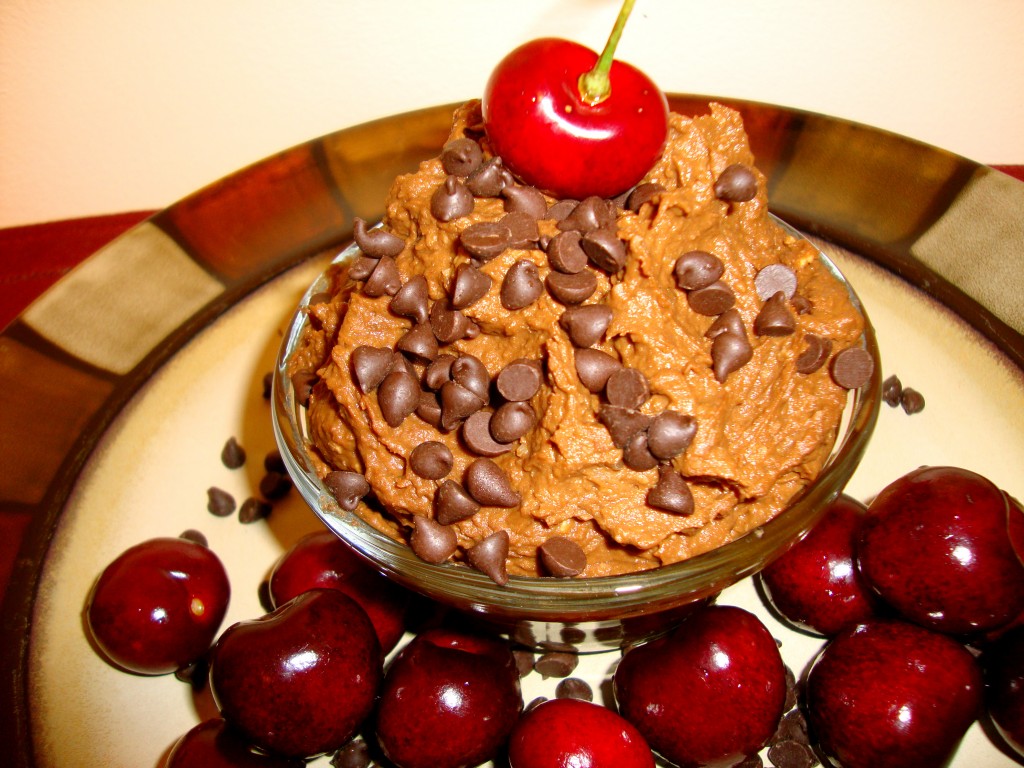
LOW-FAT Chocolate-Covered Cherry Dream Dip

x

Pretty, pretty, please with a cherry on top…

x

DON’T judge this recipe until you try it for yourself!

x

After seeing variation after variation of dessert-style dip recipes on Pinterest, I just couldn’t wait to get my hands on my food processor so I could create my very own version!

x

Thankfully, selecting a unique flavor wasn’t all that difficult.

x

See, as a little girl, I absolutely ADORED chocolate covered cherries. In fact, I loved them SO MUCH that my Dad would give me a big HUGE box of Godiva’s chocolate-covered cherries each Christmas. The fancy box of chocolates wrapped under the tree became a yearly tradition for us…as did the terrible belly aches following me eating half the box in one sitting!

x

As I grew older however, and as I became more and more concerned about my health and my physique, I began to turn away from these sugary, not-so-healthy treats and have lived without that delicious combination ever since.


UNTIL NOW.

x


Whatever you do…don’t be put off by the strange mix of ingredients. I promise the result is delicious!


Ingredients:

(makes enough to fill up a Ball Jelly Jar)

  • 1 cup chickpeas (garbanzo beans)
  • 3/4 cup dates (soaked in water for a couple of hours and drained– I like Dole and Sun-Maid because they are already so soft)
  • 1/2 cup organic,canned pumpkin (NOT the pumpkin pie mix– just plain old pureed pumpkin)
  • 2 tablespoons all-natural cherry preserves (make sure your jam uses fruit pectin instead of gelatin, or it will not be vegan! Also, strawberry or raspberry jam could work too, it just may not be as cherry-flavored)
  • 1 tablespoon unsweetened almond milk (or another non-dairy milk)
  • 2 teaspoons coconut oil (you COULD omit this to make it 100% fat-free…but I don’t think it has as nice of a consistency without it).
  • 1/2 cup blended oats (throw oats in a blender for a couple of seconds until it has a flour-like consistency)
  • 4-5 tablespoons all-natural cocoa powder (add ore or less depending upon how chocolaty you’d like it–I like it SUPER chocolaty :) )
  • 1 teaspoon pure almond extract (THIS is the secret ingredient that gives the dip its cherry flavor! Feel free to add more for a stronger “cherry” taste…but be warned…a little almond extract goes a long way so start with less and add more as you go)
  • 4 packets of stevia (or 1/4 c of another all-natural, dry sweetener–add more or less depending upon how sweet you’d like it).


Directions:

  • Add everything into a food processor and blend until VERY smooth.
  • Serve the dip immediately, or store it in a sealed container–I use a Ball Jelly Jar–in the fridge for up to 4-5 days (If serving after having been chilled in fridge for a while, I would suggest setting the dip out for 20 minutes or so and mixing it well before serving– I find the consistency to be a bit smoother this way).
x

You can use this dessert dip as a dip for fruit, cookies, and crackers, or even as a spread for toast. Heck, it’s so yummy you could get away with just eating it like a mousse or a pudding. I bet it would even taste good layered between my Very Berry Vegan Pancakes…(NOW we’re talking!)

It’s healthy, it tastes delicious, and it’s quick and easy to make. I personally like to layer it on a rice cake or toast in the morning and chow down while I’m running to the bus. Sometimes I even add a few slices of banana on top for good measure ;)

x

x

Not too crazy about cherries? You can easily swap out certain ingredients and make a few simple substitutions to change-up the flavor.

(official recipes/photos to come soon!)

  • Peppermint Patty Dip: Just swap out the jam and almond extract, and add some peppermint extract.
  • Double Trouble Chocolate Dip: Swap out the almond extract for vanilla extract, and add some extra cocoa and a swirl of chocolate sauce.
  • Peanut Butter Cup Dip: Swap out the almond extract and coconut oil, and add a couple of tablespoons of peanut butter.
  • Chocolate-Covered Banana Dip : Omit the jam and almond extract for vanilla extract, and swap out the pumpkin for a large, VERY ripe banana
  • Crazy Coconut Chocolate Dip: Swap out the almond extract for vanilla extract, and add a few tablespoons of unsweetened, shredded coconut
x

The options are endless!

GO CRAZY.


Healthfully yours,

Ashley Michelle


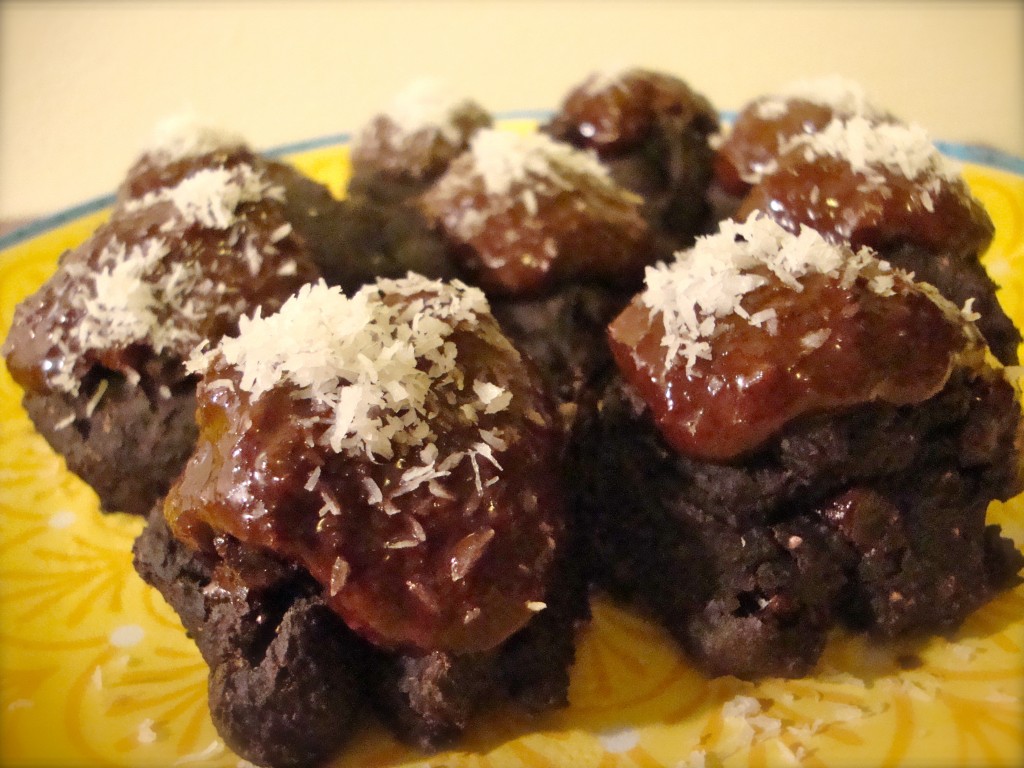
Chocolate-Coconut Truffle Cookies

BEST mistake I’ve ever made!

x

These cookies were a BIG (delicious) MISTAKE.

x

No, seriously.

x

I made them by accident! :-o

x

There. Now you know my secret!

Before I post a finished recipe on this blog, I typically go through a few unsuccessful cooking attempts and trial runs in the kitchen (a big thanks to the boyfriend for testing out some of the best and worst recipes ever created!). This is large in part because I like to keep the fat and sugar content down as much as I can without sacrificing taste. Plus, since all of my recipes are made from scratch and I tend to come up with many of them off the top of my head, a lot of recipe tweaking needs to happen first in order to get the consistency just right (and if you’ve done some vegan baking before, you know it can be especially tricky to get vegan dough and batter to rise correctly).

These healthy Chocolate-Coconut Truffle Cookies were one of those times when the un-tweaked recipe actually turned out BETTER than the one I was going for.

Originally, I set out to create a single-serving microwave chocolate cake (inspired by my One-Minute Chocolate Maple Banana Cake), but when the batter turned out to resemble cookie dough instead of cake batter, I decided to go with it.

x

Thank GOODNESS I did :)

x

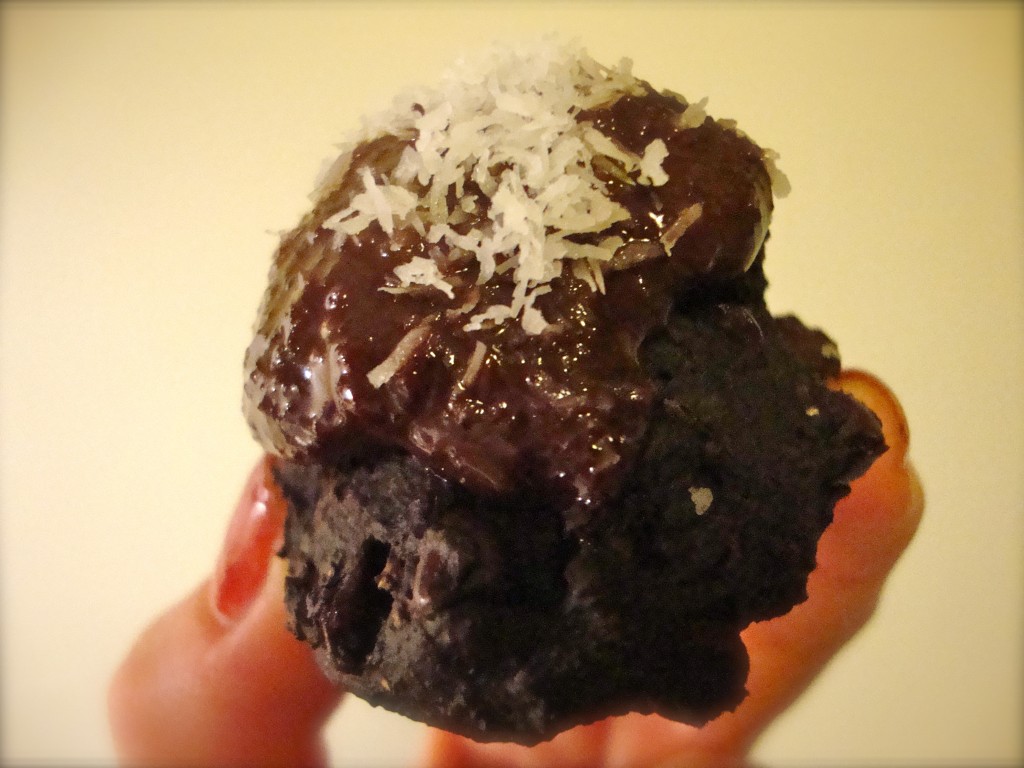
Or I wouldn’t have ended up with these little gems!

x

I swear, they’re just like brownie bites…but BETTER–and, they’re a fabulous dessert to bring to a cookout or summer party. I guarantee no one will EVER be able to guess they are VEGAN (or HEALTHY for that matter!).

x

Dry Ingredients:

  • 1/2 cup whole grain flour (spelt, whole wheat, oat etc…)
  • 3 packets stevia
  • 1/2 teaspoon baking soda
  • 3 tablespoons all-natural cocoa powder
  • Optional: 2 tablespoons all-natural non-dairy chocolate chips (omit if you want these to be sugar-free)
x
Wet Ingredients:
  • 2 tablespoons all-natural apple sauce
  • 1/4 cup plus 1 tablespoon of almond milk (or another non-dairy milk– soy, coconut etc…)
  • 2 teaspoons unrefined coconut oil
x
Directions:
(Recipe makes about 20 cookies, but you may be able to get a few more out of it…I accidentally ate a lot of the batter–again. OOPS!)
  • Preheat the oven to 340º.
  • Mix all the dry ingredients in one bowl and set aside.
  • Melt the coconut oil in a bowl and add in the rest of the wet ingredients.
  • Add the dry ingredients into the wet ingredients and mix just until smooth (do not over-mix).
  • Spoon heaping teaspoons onto a cookie sheet sprayed with all-natural non-stick spray.
  • Bake for 10 minutes (they may look a little underdone, but this is okay).
x
Once the little truffle cookies cool, feel free to gobble them up as is, OR, frost them with my Creamy Chocolate Glaze and add a sprinkle of some unsweetened coconut! If you want to go for sugar-free chocolate glaze, make my healthy chocolate bar recipe, but just don’t refrigerate the chocolate sauce–drizzle it allllllll over the cookies instead!
x
x

Of course, I would definitely suggest bringing these along to your Memorial Day party.

x

But, if you want to “accidentally” keep the whole tray for yourself…I promise I won’t tell ;)

x

Healthfully yours,

Ashley Michelle


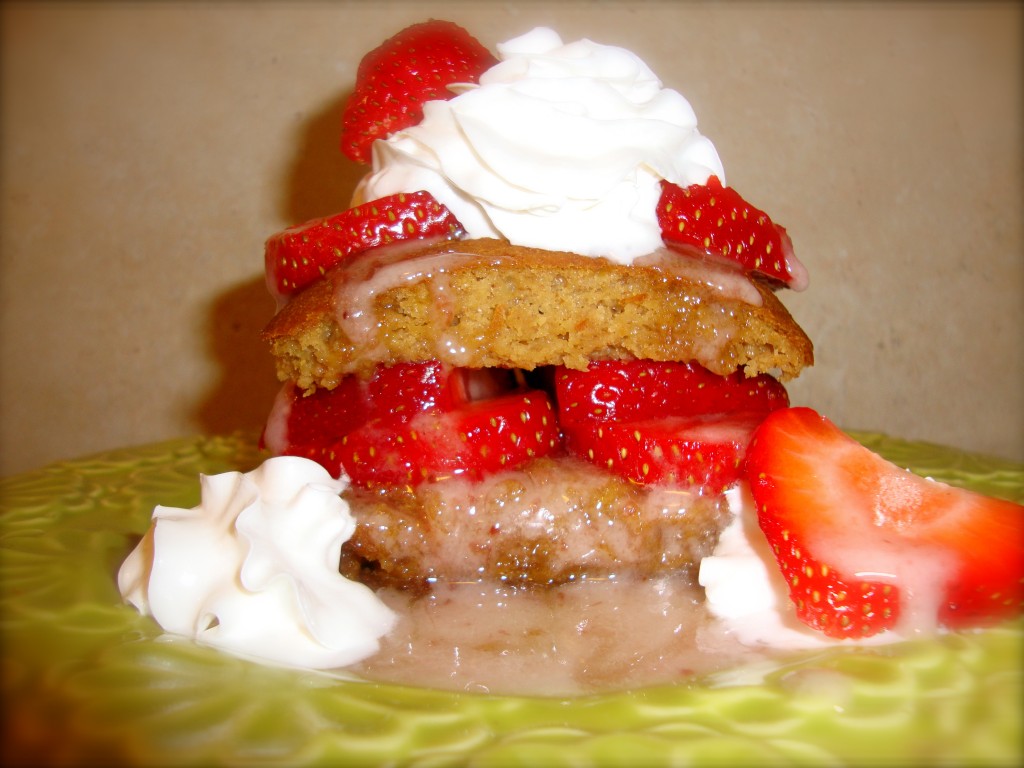
Oh So Sassy Strawberry Shortcake

Perfect for date night :)

Okay, so I know it’s only halfway through the work week…

but who says date-night is ONLY for the weekends?

x

Tonight…BREAK THE RULES.

x

Light a couple of candles, cue the romantic music, and grab a fork–because this decadent little recipe is BEST when shared. You now have permission to make Wednesday the sassiest night of the week. 

x

Little black dress optional ;) .

x

I don’t know about you, but I think strawberries make a pretty sexy addition to any dessert. They’re just sweet enough without being too saccharine, plus, they look  GREAT in red–and every girl already knows if you want to get noticed… you put on some red! Kind of sounds like a dating profile, huh?

x

But seriously, what’s NOT to love about a food that pairs so well with champagne? After all, nothing’s better than a date night that includes strawberries and a little bubbly. I mean, there’s GOT to be a reason Victoria’s Secret created a body spray named after this very combination…am I right?

x

Now, technically strawberry season doesn’t officially start until June, but when I walked into the grocery store yesterday and was greeted by a sign advertising  a “buy one get one free” special for containers of strawberries, I just couldn’t resist. They looked like shiny little boxes of rubies and to top it off they smelled incredible. Plus, who doesn’t love  a good deal?? Now what’s a girl to do with ALL THESE STRAWBERRIES?

x

Immediately my mind began racing with ideas for strawberry-inspired recipes (don’t worry, I came up with a whole bunch of them to share with you in some of my future posts!). But finally, after much back and forth, I settled on one that would be pleasing to the eye, yet simple enough to make on a weeknight (It serves just 2!).

x

And I was so due for a much-needed date night ;)

x

But before we get to the recipe…I wanted to share some of the amazing health benefits of strawberries. Don’t be fooled by their dainty appearance–these pretty little berries pack a whole lot of punch!

x

Health Benefits of Strawberries:

  • Boost immunity: Strawberries are high in vitamin C, which is a fast-acting antioxidant known to boost immunity. Just 1-cup of strawberries will give you 100% of your daily vitamin C requirement! It is important to obtain your daily vitamin C requirement from food, since humans are one of the only mammals who cannot produce it naturally.
  • Fight cancer: Given its high immunity properties, vitamin C can also help to fight cancer (first and foremost, a healthy body is always the best line of defense against any disease). In addition, strawberries also contain a phytochemical known as ellagic acid, which has the ability to suppress cancer cell growth. Strawberries also contain two powerful antioxidants, lutein and zeaxanthin, which work to neutralize free radicals that have a negative effect on cells.

**I’m sure you’ve heard the terms “free radicals” thrown around by the news and various health sources a lot lately, but you may not know exactly what they are. Free radicals are actually damaged, degenerated cells that, in an effort to repair and regenerate themselves, end up damaging and weakening the healthy cells around them. This can lead to cancer. This is why it’s important to fight those free radicals with proper nutrition!**

  • Fight aging: Along with its many health benefits already listed above, vitamin C is also crucial in the production of collagen, a known wrinkle preventer. Ellagic acid (also mentioned above) has also been known to prevent inflammation and collagen destruction after skin has been damaged by UV-B rays.
  • Protect your eyes: The antioxidants in strawberries may help prevent harmful cataracts, which can lead to blindness later in life. Our eyes need vitamin C to protect against free radicals from the sun’s harmful UV rays, otherwise the sun can damage our lens. Vitamin C also plays a vital role in strengthening the retina and cornea.
  • Fight cholesterol: You already know ellagic acid and flavonoids/phytochemicals work as anti-inflammatories, but they can also help counteract the effect of LDL (bad cholesterol). Studies have concluded that by incorporating strawberries into your diet, you can reduce harmful blood lipids and oxidative damage—two markers for heart disease and diabetes.
  • Regulate blood pressure: Strawberries are a great source of potassium, a heart-healthy nutrient that can help to regulate, and potentially lower, blood pressure by negating the effects of harmful sodium.
  • Reduce inflammation: Antioxidants and phytochemicals/flavonoids in strawberries may aid in reducing joint inflammation and arthritis. In a study, those who ate at least 16 strawberries a week have lower levels of C-reactive protein(CRP), which is a key indicator that inflammation is present in the body. Inflammation is a precursor to cancer.
  • Aid digestion- Strawberries are a good source of fiber, which is important for healthy digestion. Fiber can also help to fight type-2 diabetes due to its ability to slow the absorption of glucose into the bloodstream. This is why strawberries are healthy snack choice for diabetics.
  • Promote pre-natal health:  Strawberries are a good source of folate, the beneficial B-Vitaminrecommended for women who are pregnant or trying to get pregnant. Folate is important in the early stages of pregnancy as it aids in proper development of the baby’s spinal cord, brain, and skull. Folic acid, also found in strawberries, may help to prevent serious birth defects like spina bifida.
  • They keep your middle little!: Strawberries are  low-calorie, low-sugar, low-sodium, and fat-free! One and a half cups charts in at less than 100 calories. They are a perfect addition to any breakfast and serve as a great alternative to an unhealthy, sugar-filled 3:00 pm snack. What better excuse do you need to eat these tasty little guys?

 x

Oh yea…they also make a HECK of a dessert.


Dry Ingredients:

  • 1/2 cup of flour (spelt, whole-wheat, all-purpose, choose whatever “whole grain” kind you’d like)
  • 1/2 teaspoon baking soda
  • 4 packets of stevia (or 2 heaping tablespoons of another dry sweetener– feel free to adjust the sugar to your sweet tooth’s preference)


Wet Ingredients:

  • 6 tablespoons almond milk
  • 3 tablespoons apple sauce
  • 1 and 1/2 teaspoons of vanilla (The next time I make this I want to try adding a smidge under one teaspoon of almond extract instead of vanilla…the boyfriend isn’t crazy about desserts with a strong, almond-y taste, but I bet it will pair fabulously with the strawberries! Feel free to try it and let me know how it goes :) )
  • 1 teaspoon maple extract (you can replace this with vanilla extract or omit if using the almond extract)
  • 1 teaspoon Earth Balance buttery spread (you can add a couple extract teaspoons if you or your date prefer a buttery, more decadent taste– it will still be lower in fat. Just be sure to decrease the almond milk by a couple teaspoons).

 x

Directions:

  • Mix the dry ingredients in a bowl and set aside.
  • Mix all the wet ingredients in another bowl (make sure you melt the butter first).
  • Add the wet ingredients into the dry ingredients. Mix JUST until blended (try not to over-mix or your cake may not rise as well).
  • Lightly spray an individual casserole dish with all-natural cooking spray (I use this one, but you could always divide the batter into two tiny ramekins if you don’t have a mini casserole dish. You could probably even make them in a muffin tin! Just be sure to adjust the cooking time)
  •  Pour the batter into the casserole dish (be sure to spread the batter evenly–give the casserole dish a good tap on the counter to fill any empty spots)
  • Cook for 25 minutes (or until the top is light brown and begins to crack. The sides should also turn light brown and will begin to separate from the edges of the dish– every oven is a little different, and I find vegan cakes to be very sensitive to baking time/temperature, so you may need to keep checking on this one).
  • Let the cake cool. One cool enough to handle, slice it in half (across) so your cake resembles two slices of bread.
x

 NOW for the fun part!

x

  • Add a thick layer of strawberries, strawberry icing (see below), and Soyatoo vegan whipped cream in between the two shortcake slices, then do the same thing on top!
  • To make the strawberry icing: mix together 4 heaping tablespoons of organic, all-natural powdered sugar, 2 teaspoons of almond milk, and a couple teaspoons of all-natural strawberry jam. Then, drizzle it all over your cake! (Add more powder sugar if you want the icing thicker)
x

And voila! Instant date night. 

Now, go pour some champagne.

I’ll cheers to that!

 x

Fabulously yours,

Ashley Michelle

 x

Sources:

Health Benefits of Strawberries

Wikipedia: Strawberries

Best Health Magazine

Why Cancer and Inflammation?


Five-Minute Chocolate, Maple, Banana Cake for ONE!

x

There's cake under there somewhere...

x

If you LOVE quick and easy desserts…get excited.

x

Because this recipe is going to BLOW YOUR MIND.

x

Best part of all? It takes FIVE minutes to make.

Yup. NO. OVEN. REQUIRED.

Let me guess…NOW you’re excited :)

I came up with this little gem of an idea while rummaging through the cupboards last night desperately trying to find some recipe inspiration. Instead, all I found were a couple of sad-looking bananas, an almost empty container of almond milk,  a few spoonfuls of flour, and the depressing realization that I needed to do some serious grocery shopping this weekend.

But I was still in the mood for a healthy, yet totally DECADENT treat.

That’s when I had an epiphany.

x

Single-serving microwave cake.

x

This cake is SO good…even non-vegans will DEVOUR it. I promise.

Want proof?

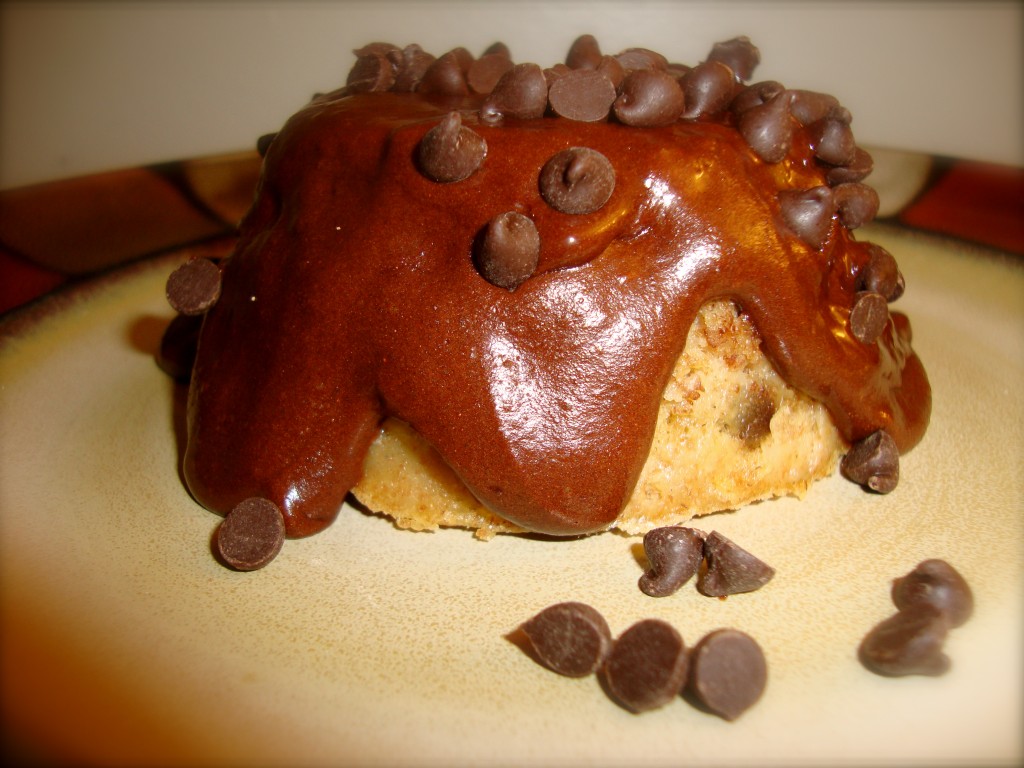
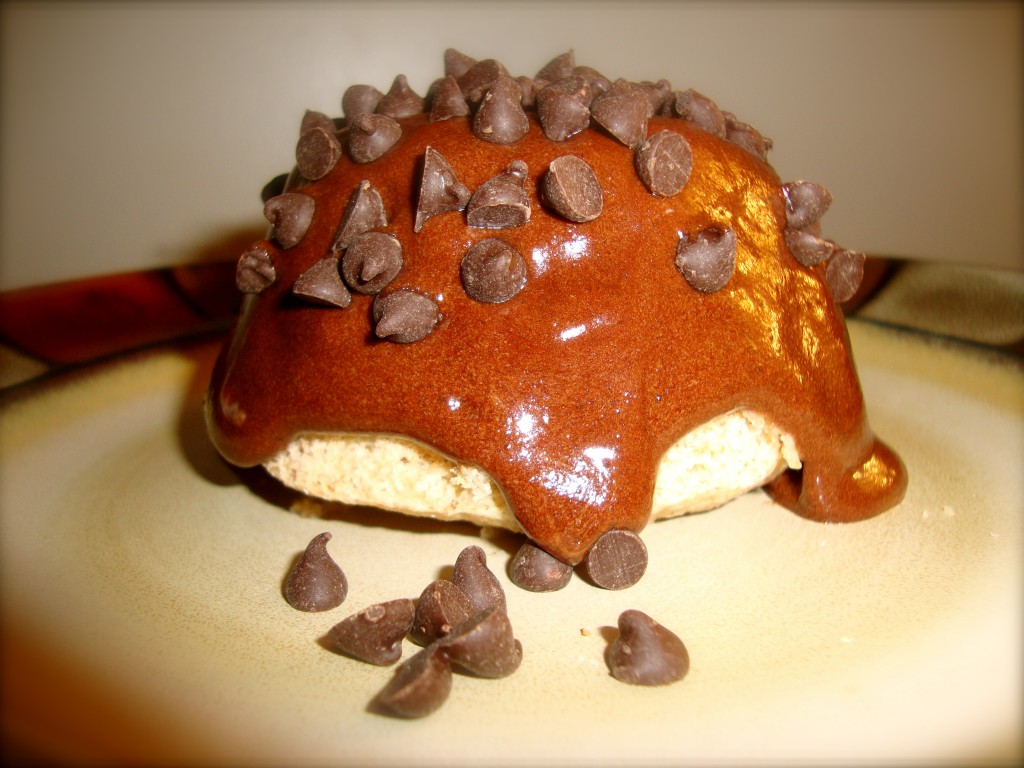
As soon as I took this gooey, chocolaty dessert out of the microwave, I hardly had enough time to glaze it and take a picture before the boyfriend gobbled it up. He even went as far as to say it’s the BEST dessert he’s ever had–and this is coming from a guy who’s not crazy about dessert in general!

All I can say is, good thing I made two so I could keep one for myself ;)

So what are you waiting for? GET BAKING!

Cake Ingredients:

  • 1/4 cup of spelt flour or other whole wheat flour (I like spelt flour because it has only moderate amounts of gluten and it can be tolerated by those who have wheat allergies and/or a wheat sensitivities. However, it is NOT gluten-free and NOT suitable for those with celiac disease)
  • a little under 1/2 teaspoon of baking soda
  • 2 packets of stevia (1/2 teaspoon) or 1 teaspoon of another natural sweetener
  • 3 tablespoons of unsweetened almond milk (or any non-dairy milk)
  • 1 1/2 teaspoon of natural maple flavor
  • 1 teaspoon of Earth Balance (or any non-dairy buttery spread– I actually prefer to NOT use any butter and add a heaping teaspoon of natural, no sugar added applesauce instead, but my boyfriend–who isn’t a fan of low-fat desserts– LOVED the texture of the cake with the Earth Balance better. It’s totally up to you! One teaspoon isn’t that much anyway.)
  • 1/2 of a medium-sized and VERY ripe organic banana, chopped
  • About 2 teaspoons of mini chocolate chips (I like dairy free, nut, and soy free Enjoy Life semi-sweet mini chocolate chips)

Directions:

  • Mix all the dry ingredients in a bowl, then add in the wet ingredients–including the banana and chocolate chips.
  • Mix until blended but do not over-mix.
  • Spray a small bowl, or ramekin (anything roughly 1-cup in size) with an all-natural non-stick spray (I’m sure a coffee mug would work, but you may have to cook it few seconds  longer)
  • Pour batter in the small bowl and microwave on high for about 2 minutes (depending on your microwave’s strength, your cake may need to cook a little longer. The top of the cake should give a little when you press down on it and should not be overly sticky/gooey on top).
  • While your cake is cooking…you can whip up the glaze! (See below)

Creamy Chocolate Glaze Ingredients:

  • 2 tablespoons of organic, all-natural powdered sugar (natural maple sugar and coconut sugar will also do–  if you don’t have powdered sugar, just blend regular sugar in a blender for a minute or so until it turns to powder).
  • 3 teaspoons of all-natural cocoa powder (I use the Trader Joe’s brand)
  • 2 teaspoons of almond milk (or any other non-dairy milk)

Directions:

  • Mix all the glaze ingredients together until smooth.
  • Slip a knife down around the cake to loosen it from the bowl, turn it over and pop it out onto a plate.
  • Pour you glaze ALL OVER your Five-Minute Chocolate, Maple, Banana Cake.
  • EAT YOUR FACE OFF.

Healthfully yours,

Ashley Michelle

x

P.S. Technically I categorized this as a dessert…but seeing as it’s the weekend and all…if you really want to eat it for breakfast, I won’t tell ;)