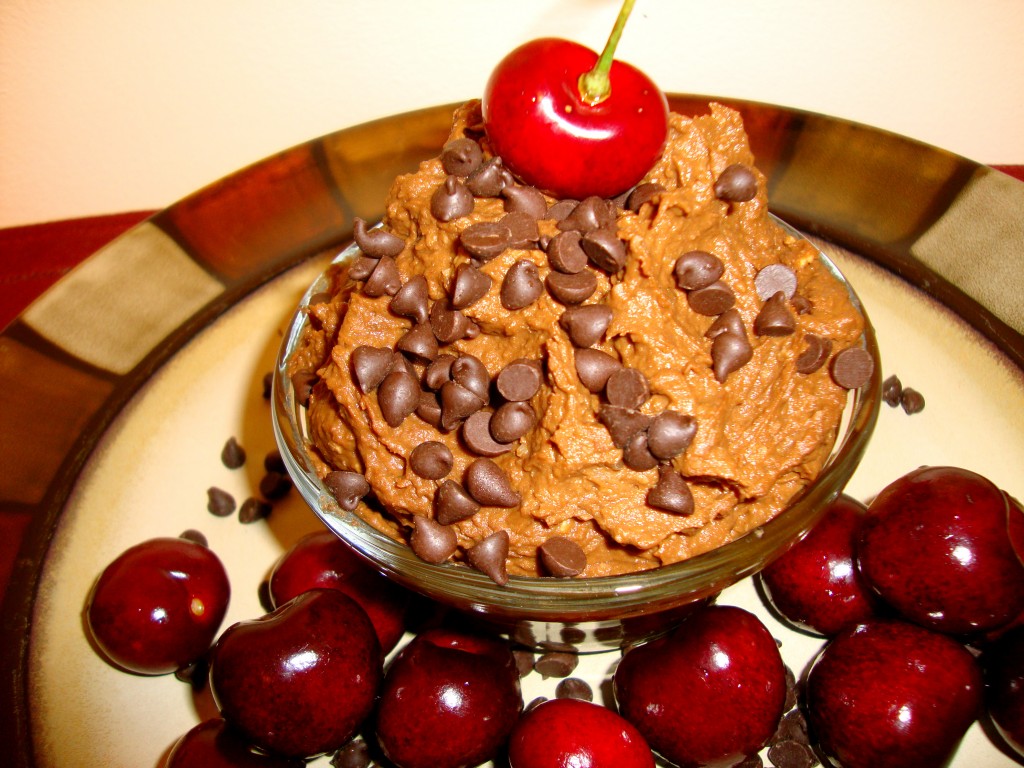
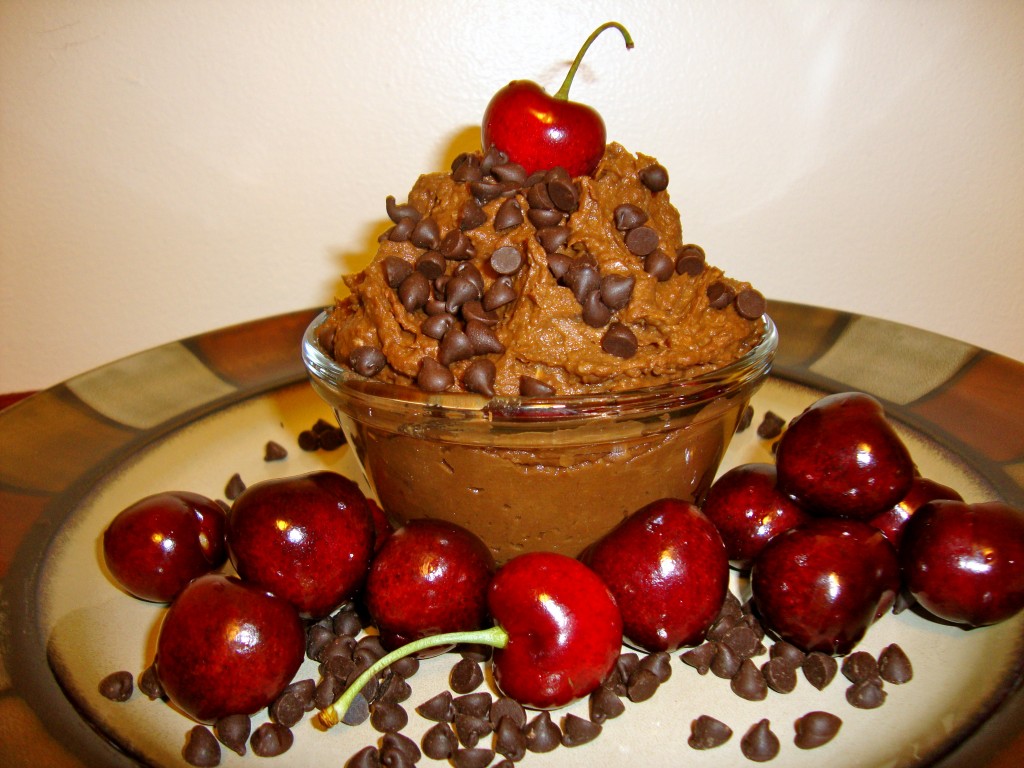
LOW-FAT Chocolate-Covered Cherry Dream Dip

x

Pretty, pretty, please with a cherry on top…

x

DON’T judge this recipe until you try it for yourself!

x

After seeing variation after variation of dessert-style dip recipes on Pinterest, I just couldn’t wait to get my hands on my food processor so I could create my very own version!

x

Thankfully, selecting a unique flavor wasn’t all that difficult.

x

See, as a little girl, I absolutely ADORED chocolate covered cherries. In fact, I loved them SO MUCH that my Dad would give me a big HUGE box of Godiva’s chocolate-covered cherries each Christmas. The fancy box of chocolates wrapped under the tree became a yearly tradition for us…as did the terrible belly aches following me eating half the box in one sitting!

x

As I grew older however, and as I became more and more concerned about my health and my physique, I began to turn away from these sugary, not-so-healthy treats and have lived without that delicious combination ever since.


UNTIL NOW.

x


Whatever you do…don’t be put off by the strange mix of ingredients. I promise the result is delicious!


Ingredients:

(makes enough to fill up a Ball Jelly Jar)

  • 1 cup chickpeas (garbanzo beans)
  • 3/4 cup dates (soaked in water for a couple of hours and drained– I like Dole and Sun-Maid because they are already so soft)
  • 1/2 cup organic,canned pumpkin (NOT the pumpkin pie mix– just plain old pureed pumpkin)
  • 2 tablespoons all-natural cherry preserves (make sure your jam uses fruit pectin instead of gelatin, or it will not be vegan! Also, strawberry or raspberry jam could work too, it just may not be as cherry-flavored)
  • 1 tablespoon unsweetened almond milk (or another non-dairy milk)
  • 2 teaspoons coconut oil (you COULD omit this to make it 100% fat-free…but I don’t think it has as nice of a consistency without it).
  • 1/2 cup blended oats (throw oats in a blender for a couple of seconds until it has a flour-like consistency)
  • 4-5 tablespoons all-natural cocoa powder (add ore or less depending upon how chocolaty you’d like it–I like it SUPER chocolaty :) )
  • 1 teaspoon pure almond extract (THIS is the secret ingredient that gives the dip its cherry flavor! Feel free to add more for a stronger “cherry” taste…but be warned…a little almond extract goes a long way so start with less and add more as you go)
  • 4 packets of stevia (or 1/4 c of another all-natural, dry sweetener–add more or less depending upon how sweet you’d like it).


Directions:

  • Add everything into a food processor and blend until VERY smooth.
  • Serve the dip immediately, or store it in a sealed container–I use a Ball Jelly Jar–in the fridge for up to 4-5 days (If serving after having been chilled in fridge for a while, I would suggest setting the dip out for 20 minutes or so and mixing it well before serving– I find the consistency to be a bit smoother this way).
x

You can use this dessert dip as a dip for fruit, cookies, and crackers, or even as a spread for toast. Heck, it’s so yummy you could get away with just eating it like a mousse or a pudding. I bet it would even taste good layered between my Very Berry Vegan Pancakes…(NOW we’re talking!)

It’s healthy, it tastes delicious, and it’s quick and easy to make. I personally like to layer it on a rice cake or toast in the morning and chow down while I’m running to the bus. Sometimes I even add a few slices of banana on top for good measure ;)

x

x

Not too crazy about cherries? You can easily swap out certain ingredients and make a few simple substitutions to change-up the flavor.

(official recipes/photos to come soon!)

  • Peppermint Patty Dip: Just swap out the jam and almond extract, and add some peppermint extract.
  • Double Trouble Chocolate Dip: Swap out the almond extract for vanilla extract, and add some extra cocoa and a swirl of chocolate sauce.
  • Peanut Butter Cup Dip: Swap out the almond extract and coconut oil, and add a couple of tablespoons of peanut butter.
  • Chocolate-Covered Banana Dip : Omit the jam and almond extract for vanilla extract, and swap out the pumpkin for a large, VERY ripe banana
  • Crazy Coconut Chocolate Dip: Swap out the almond extract for vanilla extract, and add a few tablespoons of unsweetened, shredded coconut
x

The options are endless!

GO CRAZY.


Healthfully yours,

Ashley Michelle


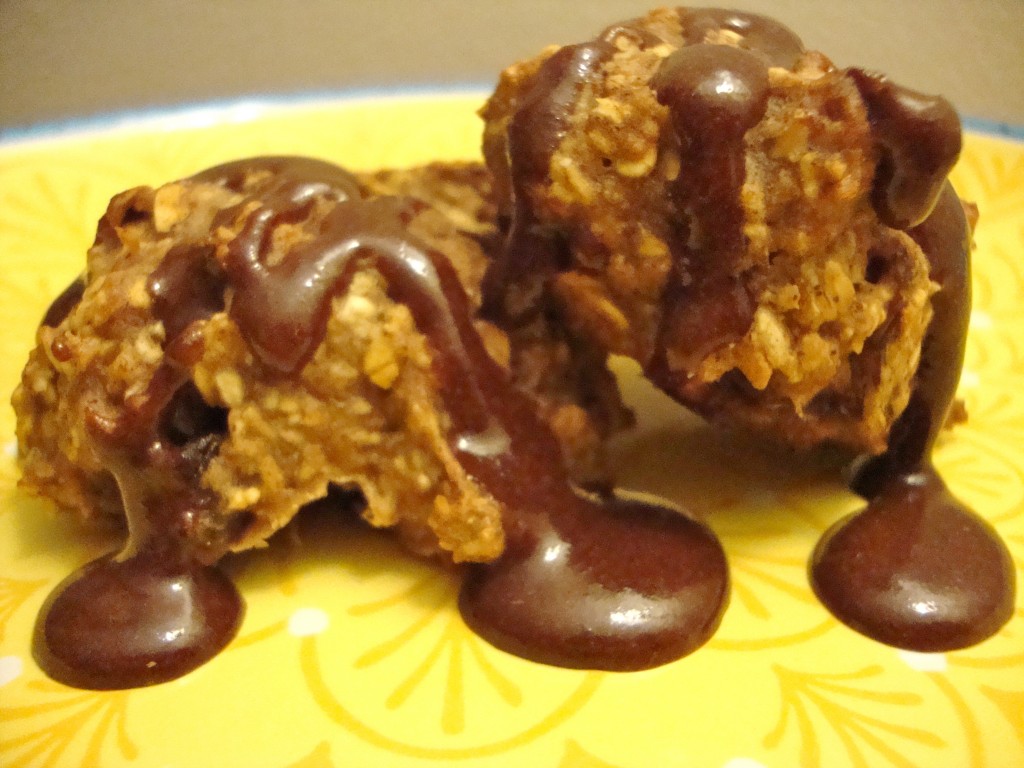
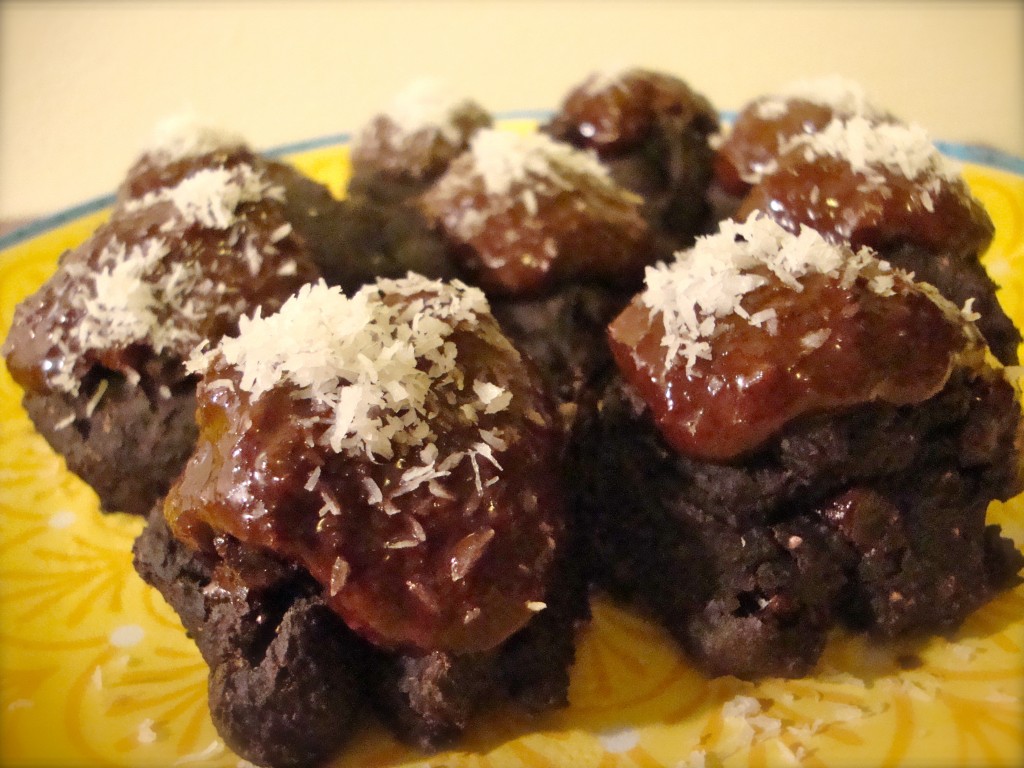
Chocolate-Coconut Truffle Cookies

BEST mistake I’ve ever made!

x

These cookies were a BIG (delicious) MISTAKE.

x

No, seriously.

x

I made them by accident! :-o

x

There. Now you know my secret!

Before I post a finished recipe on this blog, I typically go through a few unsuccessful cooking attempts and trial runs in the kitchen (a big thanks to the boyfriend for testing out some of the best and worst recipes ever created!). This is large in part because I like to keep the fat and sugar content down as much as I can without sacrificing taste. Plus, since all of my recipes are made from scratch and I tend to come up with many of them off the top of my head, a lot of recipe tweaking needs to happen first in order to get the consistency just right (and if you’ve done some vegan baking before, you know it can be especially tricky to get vegan dough and batter to rise correctly).

These healthy Chocolate-Coconut Truffle Cookies were one of those times when the un-tweaked recipe actually turned out BETTER than the one I was going for.

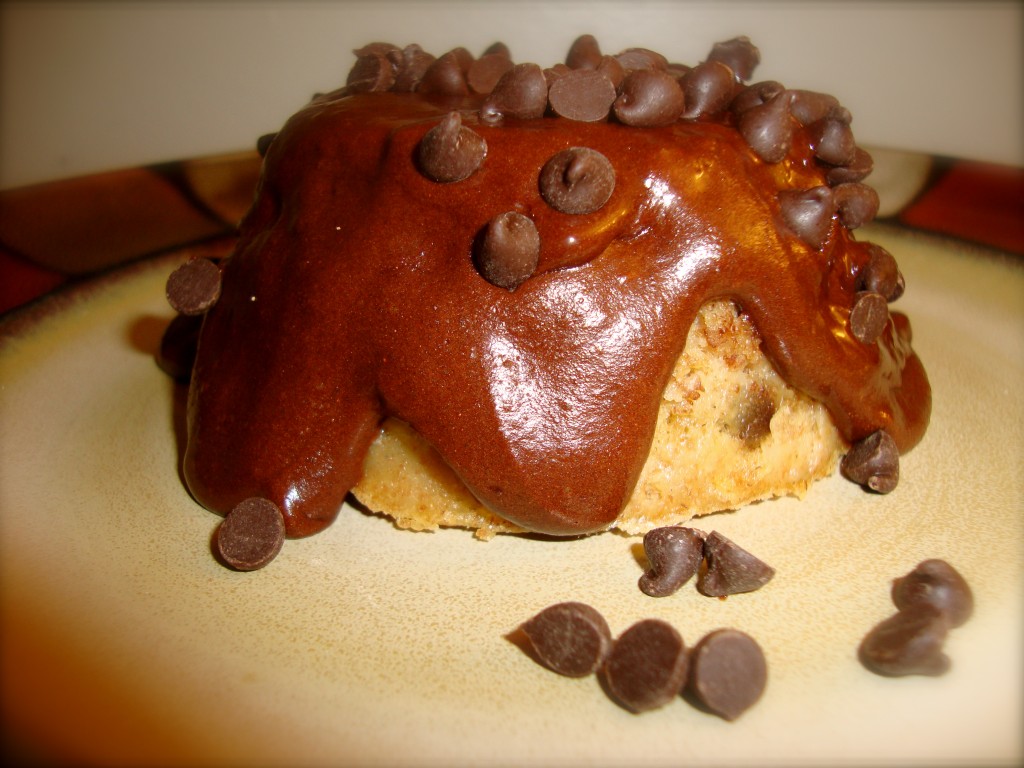
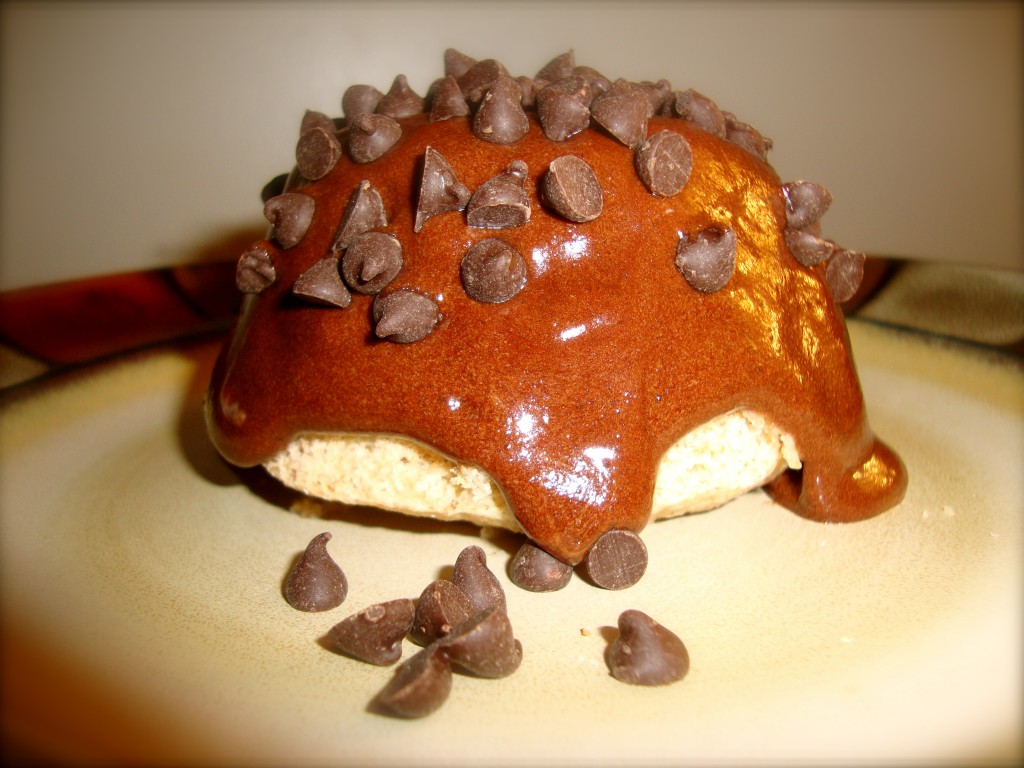
Originally, I set out to create a single-serving microwave chocolate cake (inspired by my One-Minute Chocolate Maple Banana Cake), but when the batter turned out to resemble cookie dough instead of cake batter, I decided to go with it.

x

Thank GOODNESS I did :)

x

Or I wouldn’t have ended up with these little gems!

x

I swear, they’re just like brownie bites…but BETTER–and, they’re a fabulous dessert to bring to a cookout or summer party. I guarantee no one will EVER be able to guess they are VEGAN (or HEALTHY for that matter!).

x

Dry Ingredients:

  • 1/2 cup whole grain flour (spelt, whole wheat, oat etc…)
  • 3 packets stevia
  • 1/2 teaspoon baking soda
  • 3 tablespoons all-natural cocoa powder
  • Optional: 2 tablespoons all-natural non-dairy chocolate chips (omit if you want these to be sugar-free)
x
Wet Ingredients:
  • 2 tablespoons all-natural apple sauce
  • 1/4 cup plus 1 tablespoon of almond milk (or another non-dairy milk– soy, coconut etc…)
  • 2 teaspoons unrefined coconut oil
x
Directions:
(Recipe makes about 20 cookies, but you may be able to get a few more out of it…I accidentally ate a lot of the batter–again. OOPS!)
  • Preheat the oven to 340º.
  • Mix all the dry ingredients in one bowl and set aside.
  • Melt the coconut oil in a bowl and add in the rest of the wet ingredients.
  • Add the dry ingredients into the wet ingredients and mix just until smooth (do not over-mix).
  • Spoon heaping teaspoons onto a cookie sheet sprayed with all-natural non-stick spray.
  • Bake for 10 minutes (they may look a little underdone, but this is okay).
x
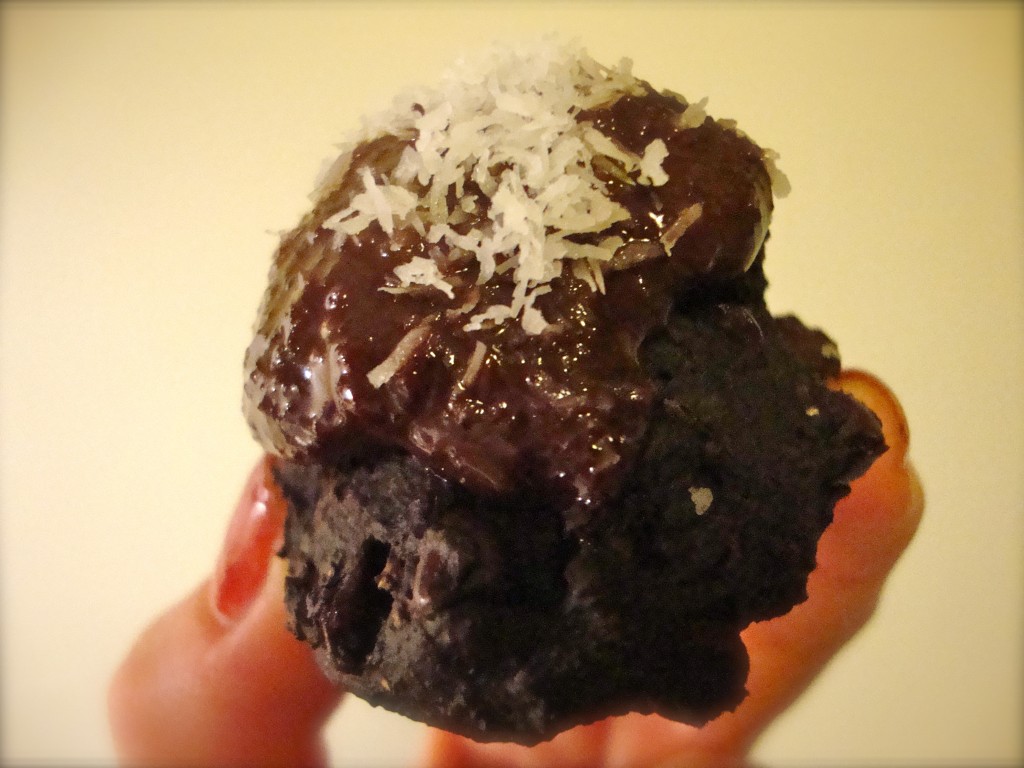
Once the little truffle cookies cool, feel free to gobble them up as is, OR, frost them with my Creamy Chocolate Glaze and add a sprinkle of some unsweetened coconut! If you want to go for sugar-free chocolate glaze, make my healthy chocolate bar recipe, but just don’t refrigerate the chocolate sauce–drizzle it allllllll over the cookies instead!
x
x

Of course, I would definitely suggest bringing these along to your Memorial Day party.

x

But, if you want to “accidentally” keep the whole tray for yourself…I promise I won’t tell ;)

x

Healthfully yours,

Ashley Michelle


Oh So Sassy Strawberry Shortcake

Perfect for date night :)

Okay, so I know it’s only halfway through the work week…

but who says date-night is ONLY for the weekends?

x

Tonight…BREAK THE RULES.

x

Light a couple of candles, cue the romantic music, and grab a fork–because this decadent little recipe is BEST when shared. You now have permission to make Wednesday the sassiest night of the week. 

x

Little black dress optional ;) .

x

I don’t know about you, but I think strawberries make a pretty sexy addition to any dessert. They’re just sweet enough without being too saccharine, plus, they look  GREAT in red–and every girl already knows if you want to get noticed… you put on some red! Kind of sounds like a dating profile, huh?

x

But seriously, what’s NOT to love about a food that pairs so well with champagne? After all, nothing’s better than a date night that includes strawberries and a little bubbly. I mean, there’s GOT to be a reason Victoria’s Secret created a body spray named after this very combination…am I right?

x

Now, technically strawberry season doesn’t officially start until June, but when I walked into the grocery store yesterday and was greeted by a sign advertising  a “buy one get one free” special for containers of strawberries, I just couldn’t resist. They looked like shiny little boxes of rubies and to top it off they smelled incredible. Plus, who doesn’t love  a good deal?? Now what’s a girl to do with ALL THESE STRAWBERRIES?

x

Immediately my mind began racing with ideas for strawberry-inspired recipes (don’t worry, I came up with a whole bunch of them to share with you in some of my future posts!). But finally, after much back and forth, I settled on one that would be pleasing to the eye, yet simple enough to make on a weeknight (It serves just 2!).

x

And I was so due for a much-needed date night ;)

x

But before we get to the recipe…I wanted to share some of the amazing health benefits of strawberries. Don’t be fooled by their dainty appearance–these pretty little berries pack a whole lot of punch!

x

Health Benefits of Strawberries:

  • Boost immunity: Strawberries are high in vitamin C, which is a fast-acting antioxidant known to boost immunity. Just 1-cup of strawberries will give you 100% of your daily vitamin C requirement! It is important to obtain your daily vitamin C requirement from food, since humans are one of the only mammals who cannot produce it naturally.
  • Fight cancer: Given its high immunity properties, vitamin C can also help to fight cancer (first and foremost, a healthy body is always the best line of defense against any disease). In addition, strawberries also contain a phytochemical known as ellagic acid, which has the ability to suppress cancer cell growth. Strawberries also contain two powerful antioxidants, lutein and zeaxanthin, which work to neutralize free radicals that have a negative effect on cells.

**I’m sure you’ve heard the terms “free radicals” thrown around by the news and various health sources a lot lately, but you may not know exactly what they are. Free radicals are actually damaged, degenerated cells that, in an effort to repair and regenerate themselves, end up damaging and weakening the healthy cells around them. This can lead to cancer. This is why it’s important to fight those free radicals with proper nutrition!**

  • Fight aging: Along with its many health benefits already listed above, vitamin C is also crucial in the production of collagen, a known wrinkle preventer. Ellagic acid (also mentioned above) has also been known to prevent inflammation and collagen destruction after skin has been damaged by UV-B rays.
  • Protect your eyes: The antioxidants in strawberries may help prevent harmful cataracts, which can lead to blindness later in life. Our eyes need vitamin C to protect against free radicals from the sun’s harmful UV rays, otherwise the sun can damage our lens. Vitamin C also plays a vital role in strengthening the retina and cornea.
  • Fight cholesterol: You already know ellagic acid and flavonoids/phytochemicals work as anti-inflammatories, but they can also help counteract the effect of LDL (bad cholesterol). Studies have concluded that by incorporating strawberries into your diet, you can reduce harmful blood lipids and oxidative damage—two markers for heart disease and diabetes.
  • Regulate blood pressure: Strawberries are a great source of potassium, a heart-healthy nutrient that can help to regulate, and potentially lower, blood pressure by negating the effects of harmful sodium.
  • Reduce inflammation: Antioxidants and phytochemicals/flavonoids in strawberries may aid in reducing joint inflammation and arthritis. In a study, those who ate at least 16 strawberries a week have lower levels of C-reactive protein(CRP), which is a key indicator that inflammation is present in the body. Inflammation is a precursor to cancer.
  • Aid digestion- Strawberries are a good source of fiber, which is important for healthy digestion. Fiber can also help to fight type-2 diabetes due to its ability to slow the absorption of glucose into the bloodstream. This is why strawberries are healthy snack choice for diabetics.
  • Promote pre-natal health:  Strawberries are a good source of folate, the beneficial B-Vitaminrecommended for women who are pregnant or trying to get pregnant. Folate is important in the early stages of pregnancy as it aids in proper development of the baby’s spinal cord, brain, and skull. Folic acid, also found in strawberries, may help to prevent serious birth defects like spina bifida.
  • They keep your middle little!: Strawberries are  low-calorie, low-sugar, low-sodium, and fat-free! One and a half cups charts in at less than 100 calories. They are a perfect addition to any breakfast and serve as a great alternative to an unhealthy, sugar-filled 3:00 pm snack. What better excuse do you need to eat these tasty little guys?

 x

Oh yea…they also make a HECK of a dessert.


Dry Ingredients:

  • 1/2 cup of flour (spelt, whole-wheat, all-purpose, choose whatever “whole grain” kind you’d like)
  • 1/2 teaspoon baking soda
  • 4 packets of stevia (or 2 heaping tablespoons of another dry sweetener– feel free to adjust the sugar to your sweet tooth’s preference)


Wet Ingredients:

  • 6 tablespoons almond milk
  • 3 tablespoons apple sauce
  • 1 and 1/2 teaspoons of vanilla (The next time I make this I want to try adding a smidge under one teaspoon of almond extract instead of vanilla…the boyfriend isn’t crazy about desserts with a strong, almond-y taste, but I bet it will pair fabulously with the strawberries! Feel free to try it and let me know how it goes :) )
  • 1 teaspoon maple extract (you can replace this with vanilla extract or omit if using the almond extract)
  • 1 teaspoon Earth Balance buttery spread (you can add a couple extract teaspoons if you or your date prefer a buttery, more decadent taste– it will still be lower in fat. Just be sure to decrease the almond milk by a couple teaspoons).

 x

Directions:

  • Mix the dry ingredients in a bowl and set aside.
  • Mix all the wet ingredients in another bowl (make sure you melt the butter first).
  • Add the wet ingredients into the dry ingredients. Mix JUST until blended (try not to over-mix or your cake may not rise as well).
  • Lightly spray an individual casserole dish with all-natural cooking spray (I use this one, but you could always divide the batter into two tiny ramekins if you don’t have a mini casserole dish. You could probably even make them in a muffin tin! Just be sure to adjust the cooking time)
  •  Pour the batter into the casserole dish (be sure to spread the batter evenly–give the casserole dish a good tap on the counter to fill any empty spots)
  • Cook for 25 minutes (or until the top is light brown and begins to crack. The sides should also turn light brown and will begin to separate from the edges of the dish– every oven is a little different, and I find vegan cakes to be very sensitive to baking time/temperature, so you may need to keep checking on this one).
  • Let the cake cool. One cool enough to handle, slice it in half (across) so your cake resembles two slices of bread.
x

 NOW for the fun part!

x

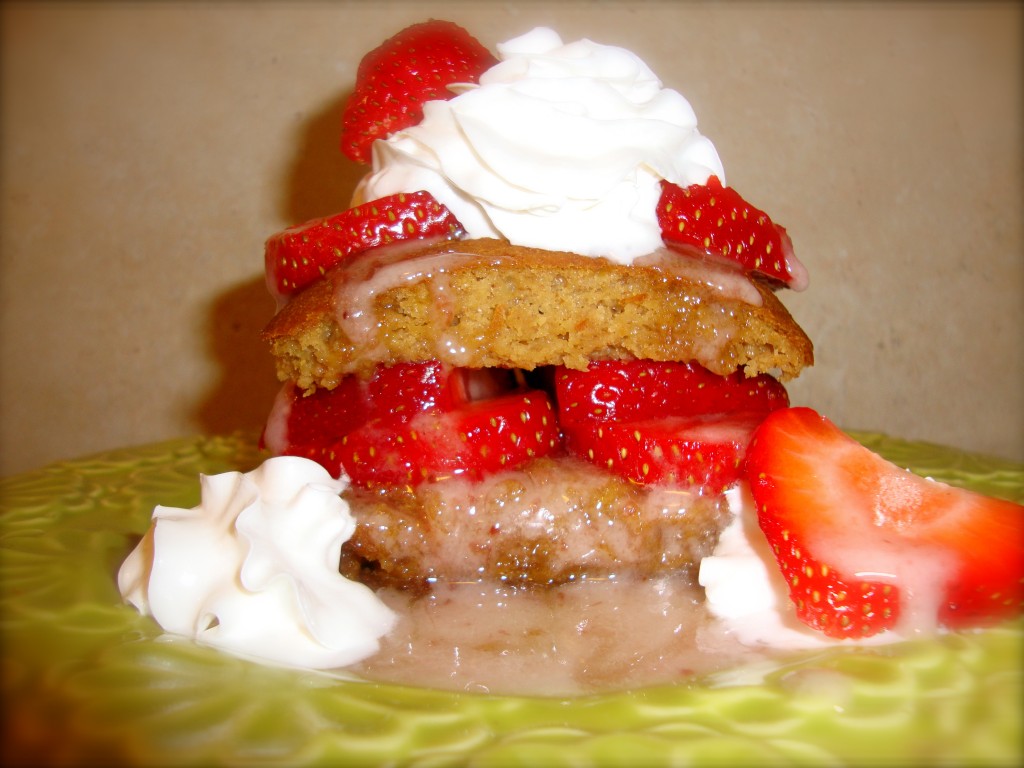
  • Add a thick layer of strawberries, strawberry icing (see below), and Soyatoo vegan whipped cream in between the two shortcake slices, then do the same thing on top!
  • To make the strawberry icing: mix together 4 heaping tablespoons of organic, all-natural powdered sugar, 2 teaspoons of almond milk, and a couple teaspoons of all-natural strawberry jam. Then, drizzle it all over your cake! (Add more powder sugar if you want the icing thicker)
x

And voila! Instant date night. 

Now, go pour some champagne.

I’ll cheers to that!

 x

Fabulously yours,

Ashley Michelle

 x

Sources:

Health Benefits of Strawberries

Wikipedia: Strawberries

Best Health Magazine

Why Cancer and Inflammation?


On-The-Run Oatmeal Cookie Breakfast Bites

I'm wayyyy better than a Munchkin!

x

It’s  Monday…

x

And you’re already running late.

x

I bet you’re wishing you didn’t hit that snooze button THREE TIMES in a row right about now. 

On a day like today, I’d guess you’ve hardly had enough time to shower, never mind make a healthy breakfast. But that’s okay…I’ve SO got you covered :)

x

Skip the drive-thru and grab a few of these On-The-Run Oatmeal Cookie Breakfast Bites on your way out the door instead.

x

This easy recipe can be whipped up the night before and will stay fresh in an airtight container all week-long. Plus, it’s QUICK to make and HEALTHY to eat!

x

Dry Ingredients:

  • 1 cup whole grain oats
  • 1/4 cup all-purpose whole-wheat flour (or spelt flour/another whole- wheat flour will work)
  • 2 teaspoons Truvia (or a little under 1/4 cup of sugar, or 4 packets of stevia)
  • 1/4 teaspoon salt
  • 2 teaspoons cinnamon (I LOVE cinnamon, so I often will add more than 2 tsp. Sometimes I add a sprinkle of nutmeg in as well– it’s totally up to you depending upon how spiced you want your cookie bites. I’d suggest lots of batter testing until it’s juuuust right ;) )
  • Heaping 1/3 cup raisins
x
Wet Ingredients:
  • 1 very ripe banana, mashed
  • 1/4 cup apple sauce
  • 1 teaspoon pure vanilla extract
  • 1/2 teaspoon pure maple extract (or vanilla extract will do)
  • 1 heaping tablespoon of all-natural unsalted peanut butter (if you use salted peanut butter, reduce/omit salt above)


Directions:

(Recipe makes about 14 cookie bites– you could probably make a couple more but I ate some (okay A LOT) of the batter!)

  • Preheat oven to 350°.
  • Mix all the dry ingredients (minus the raisins) in a bowl.
  • Mash the ripe banana in another bowl until there are almost no lumps left.
  • Add the applesauce and the other wet ingredients (minus the peanut butter) to the mashed banana.
  • Mix the wet and dry ingredients together until well-combined.
  • Mix in the peanut butter and raisins.
  • Lightly spray a pan with natural non-stick cooking spray.
  • Drop small spoonfuls of the oatmeal mixture onto the cookie sheet, shaping them into little balls.
  • Bake for 15 minutes or until the bottoms start to lightly brown (they should look a little underdone, but will firm up once sitting for a bit).
  • OPTIONAL: add a little drizzle of creamy chocolate glaze for an extra touch of sweetness– or, omit the cocoa and you’ll have a sweet vanilla glaze instead!


Now, next time you’re on-the-run (or running late!), just grab a handful of these oatmeal breakfast bites when you’re in need of a little energy boost on the way out the door!

x

Healthfully yours,

Ashley Michelle


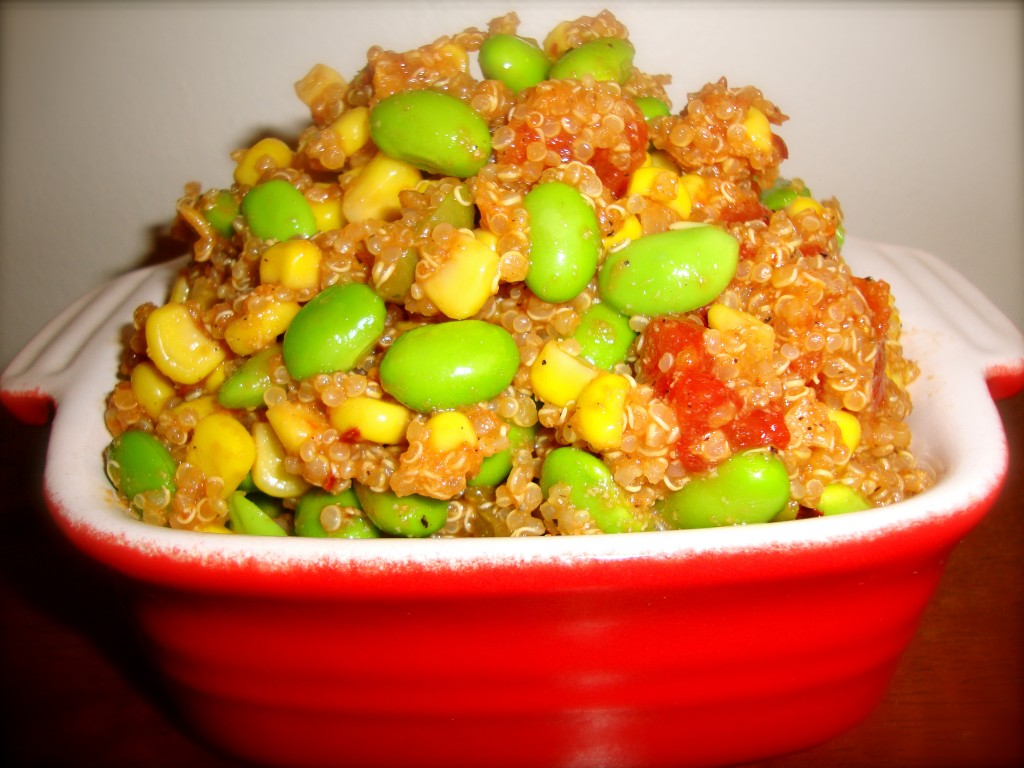
Protein-Packed Confetti Quinoa

x

Cheap and Easy…

x

It’s only a good thing when you’re talking about DINNER! ;)

x

If you happened to miss my post yesterday, I discussed the many sources of plant-based protein out there. Contrary to many people’s beliefs, there are actually plenty of protein sources available to those following a vegan or vegetarian diet. Two of my personal favorite sources of protein happen to be quinoa and edamame. Not only do these taste delicious, but they also have all 9 essential amino acids that the body can obtain from diet ALONE. This recipe below is a quick, easy, and cheap way to toss together a protein source that can be eaten on its own as a meal, added as a side dish, or thrown on top of salads.

It’s so colorful, doesn’t it remind you of confetti?!

The whole recipe makes a pretty big batch, which is great because you can whip it up on the weekend and keep it in the fridge all week long. It can be eaten both hot or chilled. My favorite happens to be the chilled version, but I’ll let you be the judge!

Now you have NO EXCUSES for not getting in your protein ;)


Ingredients:

  • 1 cup uncooked quinoa
  • 2 cups low-sodium vegetable stock (you can use water, but the vegetable stock gives the quinoa a ton of flavor. I use Trader Joe’s brand)
  • 1 cup canned/or frozen corn (thawed)
  • 1 cup shelled edamame (thawed)
  • 1 can all-natural, organic, diced tomatoes (preferably low-sodium)
  • 1/2 cup all-natural, organic tomato sauce (preferably low-sodium)
  • 1/2 teaspoon garlic powder
  • 1/2 teaspoon onion powder
  • 1/2 teaspoon ground black pepper
  • 1 tablespoon nutritional yeast (optional, but it definitely gives the quinoa a yummy and nutty/cheesy flavor)
  • Sprinkle of crushed red pepper (optional)
  • 1 whole avocado, diced (optional– but adds a source of healthy fat plus some extra protein)
Directions:
  • Heat the quinoa and vegetable stock in a pot on high until it comes to a full boil.
  • Reduce the quinoa to medium heat and cover 10-15 minutes until liquid evaporates. Fluff with a fork.
  • Transfer the quinoa to a large bowl (If making the “cold version,” cool quinoa for an hour in refrigerator and then follow the rest of the steps.  If making the warm version, continue with the rest of the steps now).
  • Add in the corn, edamame, can of tomatoes, and 1/2 cup of tomato sauce. Mix well.
  • Mix in the spices and nutritional yeast.
  • Gently fold in the ripe avocado (be careful not to mush it!).

x

Pretty easy, huh?

x

x
Healthfully yours,
Ashley Michelle


x


But WHERE Do You Get Your Protein??

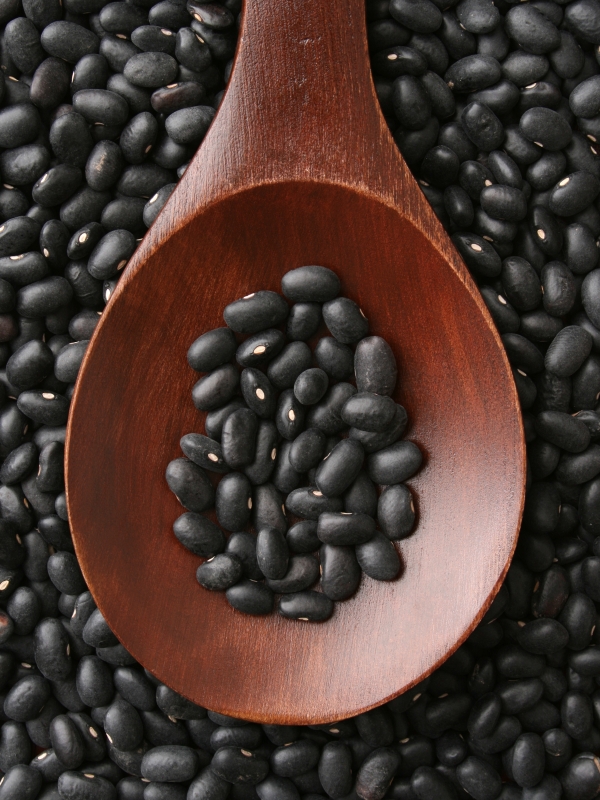
http://office.microsoft.com/en-us/images/results.aspx?qu=beans&ctt=1#ai:MP900442670|mt:0|

Credit: iStockphoto- Microsoft Partner

x

X


Ah. The age-old question for vegetarians and vegans alike.

x

If I had a dollar for every time someone asked me “aren’t you afraid you aren’t getting enough protein?” when I tell them I’m vegan, well, I’d have a pair of these Louboutins in my closet ;) .


I suppose the protein question  isn’t completely unfounded –after all, our bodies DO require protein in order to maintain/build muscle mass, regenerate/repair cells,  keep our immune systems strong, and prevent fatigue. The problem is, many people automatically assume vegans and vegetarians don’t have many or enough options for protein sources, and therefore we must struggle to get enough of it in our diets.

x

Well, I’m here to tell you DON’T WORRY!

x

There are plenty of ways to consume a perfectly healthy amount of protein while following a plant-based diet.

x

According to the Centers for Disease Control and Prevention, the average man needs 56 grams of protein a day and the average woman needs 46 grams. Protein is certainly an integral part of our diets (as are fats, carbohydrates, and fruits/veggies), but I believe it is wise to keep in mind that these numbers are very flexible. Some people may require more or less protein than average. Because every body is extraordinarily different, everyone’s needs will naturally vary depending upon factors like height, weight, age, and level of activity– not to mention, if you are pregnant or breastfeeding. If you like visuals, I found an interesting chart here that gives a pretty cool little breakdown of average protein needs by body weight and activity level. As you can see, it’s pretty wide-ranging!


The reason most people may worry about vegans/vegetarians not getting enough protein is because not all plant-based protein is considered to be a complete protein. If one or two amino acids are missing from a protein source, it is considered to be an incomplete protein. In order to gain status as a complete protein, a food must contain all 9 essential amino acids that the body cannot generate.  Amino acids are essentially the “building blocks” of protein in that they join together to create a protein source your body can then use. There are 20 different amino acids in total, 11 of which the human body can make on its own. Therefore, it is “essential” the other 9  come from our diet.


Many vegan proteins contain some of the amino acids, but not all. These are considered incomplete proteins. Protein sources that contain all 9 essential amino acids are considered high quality or complete proteins. These essential amino acids are most commonly found in meat and animal products.  However, those following a plant-based diet need not worry about consuming complete protein at every meal. Your body is smart! It can combine amino acids (whether complete or incomplete) to get the proper protein it needs as long as the different types of proteins are eaten in the same day. In the past, it was believed that complementary proteins (two incomplete proteins that, when combined, provide all 9 essential amino acids) had to be eaten at the same time.

x

Reminder: As always, I encourage you to consult your own nutritionist or doctor to find out your exact protein needs if protein intake is a concern of yours. There is a lot of conflicting information out there, so I’ll always urge you to do your own research and choose what is best for you. Plus, research provides a great opportunity to learn something new   :)

x

Below you’ll find my list of some popular vegan protein sources and average grams of protein in each serving. If you’re bored with your typical protein routine, perhaps this list will help you to get creative with your next meal! And PLEASE don’t be discouraged by some of these items. They may sound strange…but everything on this list easily accessible and can be found at Trader Joe’s, Whole Food’s and/or in the natural sections of most large grocery store chains. I’ll also be posting a protein-packed, budget-friendly recipe in my next post to get you started.

x

Vegan Protein Sources:

(**= Has all 9 essential amino acids)

  • Tempeh: 1/2 cup = 20 grams
  • Seitan: 4 oz. = 26 grams (Weird name right? If you haven’t heard of this one…read about it here)
  • Tofu: 4 oz. = 8 grams
  • Hummus: 2 tablespoon = 2 grams (depending on brand)
  • Quinoa: 1/2 cup cooked= 10 grams ** 
  • Soy Milk: 1 cup = 7 grams **
  •  Lentils: (legumes): 1/2 cup= 9 grams
  • Edamame: 1/2 cup = 8 grams **
  • Beans: (red,white, black, garbanzo, kidney etc…): 1/2 cup = 7-8 grams
  • Soybeans: 1/2 cup = 10 grams **
  • Spinach: 1 cup (cooked) = 5 grams
  • Peas: 1 cup= 9 grams
  • Broccoli: 1 cup (cooked) = 5 grams
  • Sprouted Grain Bread: 2 slices = 8 grams (Ezekiel 4:9 bread is an example of sprouted bread)
  • Brown Rice: 1 cup = 5 grams
  • Buckwheat noodles: 1/2 cup= 14-16 grams **
  • Nutritional Yeast: 2 tablespoons = 8 grams ** (This also has all 9 essential amino acids! I’ll be writing more about this great product in a future post! But you can read about it first, here).
  • Hemp Protein Powder: 2 rounded tablespoons = 6 grams (Hemp Protein)
  • Pea Protein Powder: 2 rounded tablespoons = 28 grams (Pea Protein)
  • Brown Rice Protein Powder:  2 rounded tablespoons: 15 grams (Brown Rice Protein)
  • Soy Protein Powder: 2 rounded tablespoons = 23 grams (Soy Protein)
  • Peanut butter: 2 tablespoons = 8 grams
  • Almond Butter: 2 tablespoons= 8 grams
  • Peanuts: 1 ounce = 6.5 grams
  • Pistachios: 1 ounce = 5.8 grams
  • Almonds: 1 ounce= 6 grams
  • Soy nuts: 1/4 cup = 12 grams (and ONLY 6 grams of fat!)
  • Chia Seeds: 2 tablespoons= 5 grams (GREAT addition to any diet. Read about their many benefits here)
  • Flax seeds: 2 tablespoons= 4 grams
  • Sesame seeds: 1 ounce= 6.5
  • Pumpkin seeds: 1 ounce = 5 grams

x

Now I don’t know about you…but I think this list set you up for pretty decent argument the next time someone says you CAN’T get enough protein following a plant-based diet!

x

Healthfully yours,

Ashley Michelle

x

Sources:

Livestrong: Hemp vs. Pea Protein

Livestrong: Plant Protein

Livestrong: Is Edamame Good for you?

Livestrong: How much protein do women need?

Soy: A Complete Protein

FitSugar:Protein Chart

CDC.gov

Tofu as an alternative to meat

Vegetarian Proteins

Vegetarian Protein

Saavy Vegetarian


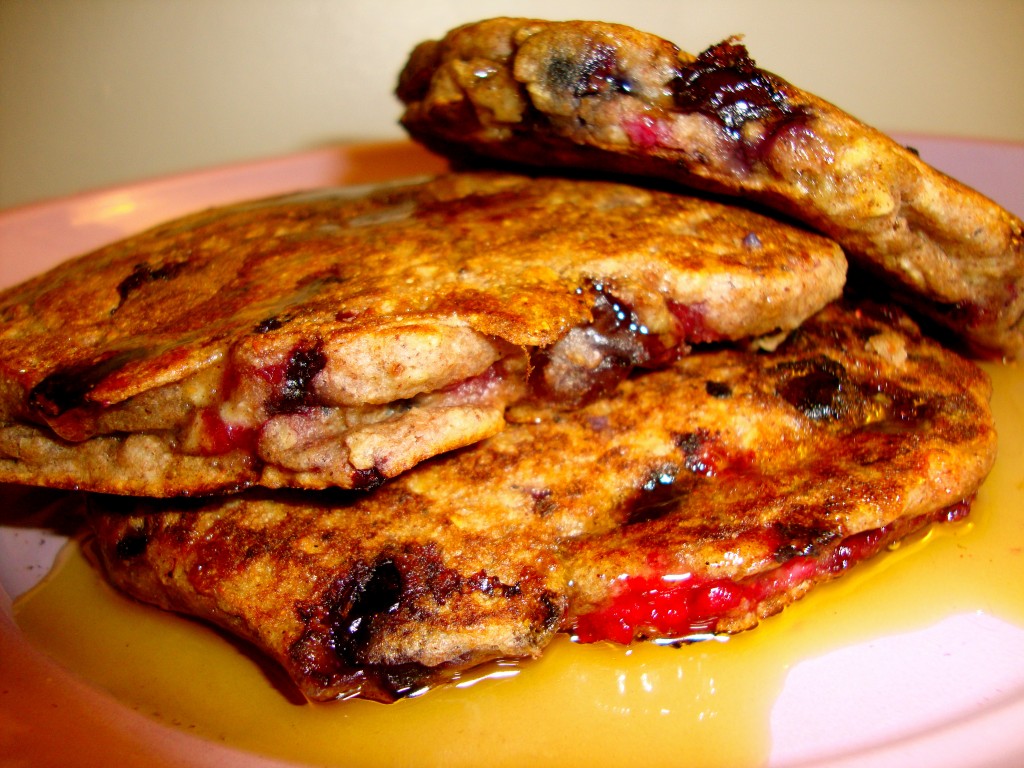
Very Berry Vegan Pancakes

Happy Mother’s Day to all you FABULOUS Moms out there!

Good morning :)

x

Now, go beg your kids to make you THESE.

x

Immediately.

x

And if you ARE the kid, it’s time to get cooking… you’ll be Mom’s favorite after she takes JUST ONE BITE :)

This breakfast delight is quick, easy, and healthier than your typical pancake, so you really have no excuse NOT to make them. And the best part is, they sound pretty darn fancy, so it will seem as though you spent all morning preparing this tasty little spread.

x

Recipe:

(Makes 3 large pancakes)

Dry Ingredients:

  • 2/3 cup of spelt flour (or any whole wheat flour– you can read why I like spelt here)
  • 1/4 cup of whole grain oats
  • 1 plus 1/3 teaspoon of baking powder
  • 1 heaping teaspoon of cinnamon
  • 1/4 heaping teaspoon of nutmeg
  • a little under 1/4 teaspoon of salt
  • 2 packets of Stevia (or 1 teaspoon of another type of all-natural granulated sugar)

Wet Ingredients:

  • 1 teaspoon of all-natural maple flavor (I’m sure all-natural vanilla or almond extract would taste amazing too!)
  • 2/3 cup of unsweetened almond milk (or another non-dairy milk)
  • 1 plus 1/2 tablespoon of melted coconut oil (You can use another all natural oil, or melted non-dairy buttery spread,  but I think the coconut gives the cakes a distinctly delicious flavor. You could also substitute applesauce for the oil and make these fat-free, but they WILL be a little chewier and less fluffier than normal. I personally prefer either way, but if you are not used to fat-free baking, I’d keep the oil in.)
  •  1 cup of mixed berries (I like the Trader Joe’s Very Cherry Blend– cherries, blackberries, raspberries AND blueberries!)
  • Optional: Top with a drizzle of all-natural maple syrup (I personally think the berries and maple extract give these enough flavor and gooeyness without the syrup, but feel free to add it if you’d like.)
Please Note: The batter will be much thicker than your typical non-vegan pancake batter


Directions:

  • Mix the dry ingredients in a bowl and then add in the wet ingredients (minus the berries).
  • **Be sure to add the berries LAST and DO NOT OVER-MIX, unless you want purple pancakes!** (Which actually, now that I think about it, could be quite pretty!)
  • Lightly spray a pan with all-natural non-stick spray and set the stove at medium heat.
  • Spoon 1/3 of the batter into the pan, flattening and molding it into a thick “pancake” shape.
  • Flip after 2 minutes (depending on the strength of your stove you may need to cook a bit longer–but keep checking so you don’t burn your pancake!)
  • Repeat 2 more times with the rest of the batter.
x

Now go serve Mom breakfast in bed :)


Healthfully Yours,

Ashley Michelle


P.S.– As you all know by now, my non-vegan boyfriend has unsuspectingly become my official taste-tester (tough life, I know). So, just to prove these babies were omnivore/vegetarian friendly, I decided to use his new title to my advantage and conduct a little taste-testing experiment (Muahaha!). Before I hit the gym this morning, when the boyfriend was still sleeping, I cooked up a plate of Very Berry Vegan Pancakes and left them on the counter. Wouldn’t you know, when I came home, the pancakes were magically gone. Hmmm…I wonder where they went…


Five-Minute Chocolate, Maple, Banana Cake for ONE!

x

There's cake under there somewhere...

x

If you LOVE quick and easy desserts…get excited.

x

Because this recipe is going to BLOW YOUR MIND.

x

Best part of all? It takes FIVE minutes to make.

Yup. NO. OVEN. REQUIRED.

Let me guess…NOW you’re excited :)

I came up with this little gem of an idea while rummaging through the cupboards last night desperately trying to find some recipe inspiration. Instead, all I found were a couple of sad-looking bananas, an almost empty container of almond milk,  a few spoonfuls of flour, and the depressing realization that I needed to do some serious grocery shopping this weekend.

But I was still in the mood for a healthy, yet totally DECADENT treat.

That’s when I had an epiphany.

x

Single-serving microwave cake.

x

This cake is SO good…even non-vegans will DEVOUR it. I promise.

Want proof?

As soon as I took this gooey, chocolaty dessert out of the microwave, I hardly had enough time to glaze it and take a picture before the boyfriend gobbled it up. He even went as far as to say it’s the BEST dessert he’s ever had–and this is coming from a guy who’s not crazy about dessert in general!

All I can say is, good thing I made two so I could keep one for myself ;)

So what are you waiting for? GET BAKING!

Cake Ingredients:

  • 1/4 cup of spelt flour or other whole wheat flour (I like spelt flour because it has only moderate amounts of gluten and it can be tolerated by those who have wheat allergies and/or a wheat sensitivities. However, it is NOT gluten-free and NOT suitable for those with celiac disease)
  • a little under 1/2 teaspoon of baking soda
  • 2 packets of stevia (1/2 teaspoon) or 1 teaspoon of another natural sweetener
  • 3 tablespoons of unsweetened almond milk (or any non-dairy milk)
  • 1 1/2 teaspoon of natural maple flavor
  • 1 teaspoon of Earth Balance (or any non-dairy buttery spread– I actually prefer to NOT use any butter and add a heaping teaspoon of natural, no sugar added applesauce instead, but my boyfriend–who isn’t a fan of low-fat desserts– LOVED the texture of the cake with the Earth Balance better. It’s totally up to you! One teaspoon isn’t that much anyway.)
  • 1/2 of a medium-sized and VERY ripe organic banana, chopped
  • About 2 teaspoons of mini chocolate chips (I like dairy free, nut, and soy free Enjoy Life semi-sweet mini chocolate chips)

Directions:

  • Mix all the dry ingredients in a bowl, then add in the wet ingredients–including the banana and chocolate chips.
  • Mix until blended but do not over-mix.
  • Spray a small bowl, or ramekin (anything roughly 1-cup in size) with an all-natural non-stick spray (I’m sure a coffee mug would work, but you may have to cook it few seconds  longer)
  • Pour batter in the small bowl and microwave on high for about 2 minutes (depending on your microwave’s strength, your cake may need to cook a little longer. The top of the cake should give a little when you press down on it and should not be overly sticky/gooey on top).
  • While your cake is cooking…you can whip up the glaze! (See below)

Creamy Chocolate Glaze Ingredients:

  • 2 tablespoons of organic, all-natural powdered sugar (natural maple sugar and coconut sugar will also do–  if you don’t have powdered sugar, just blend regular sugar in a blender for a minute or so until it turns to powder).
  • 3 teaspoons of all-natural cocoa powder (I use the Trader Joe’s brand)
  • 2 teaspoons of almond milk (or any other non-dairy milk)

Directions:

  • Mix all the glaze ingredients together until smooth.
  • Slip a knife down around the cake to loosen it from the bowl, turn it over and pop it out onto a plate.
  • Pour you glaze ALL OVER your Five-Minute Chocolate, Maple, Banana Cake.
  • EAT YOUR FACE OFF.

Healthfully yours,

Ashley Michelle
x

P.S. Technically I categorized this as a dessert…but seeing as it’s the weekend and all…if you really want to eat it for breakfast, I won’t tell ;)


Chocolate Heaven Martini

Chocolate Heaven Martini!

As if you died and went to HEAVEN…

x

A CHOCOLATE HEAVEN that is.

x

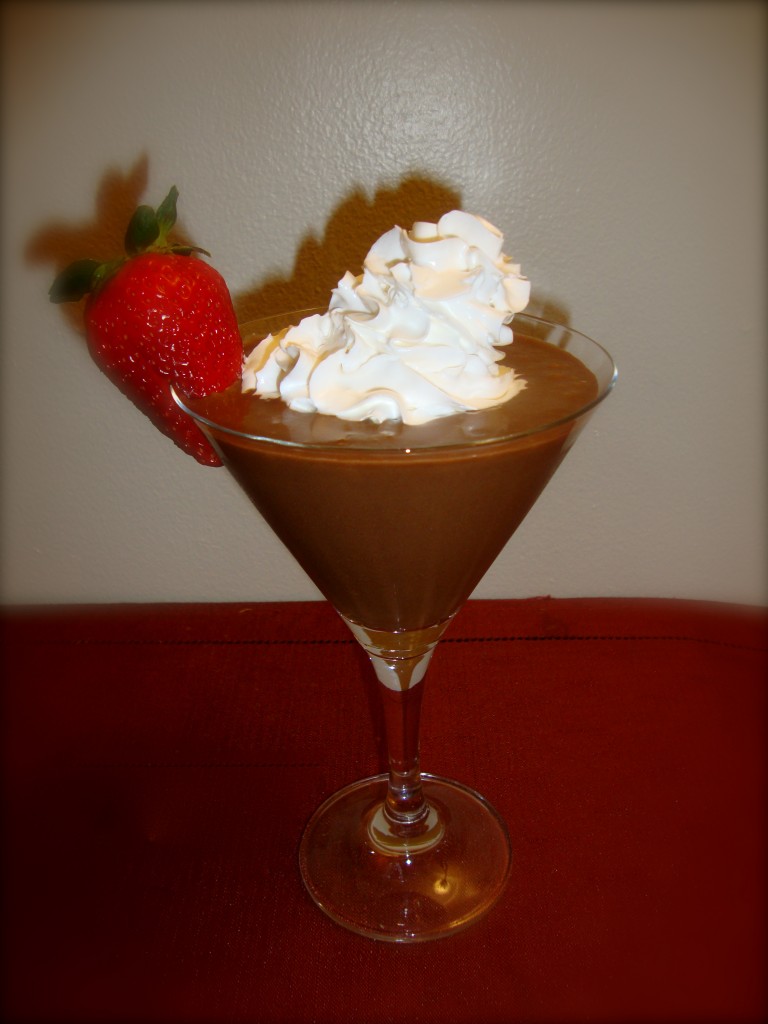
What can I say? Monday’s are rough. But that’s nothing a martini glass and a little bit  (a lot a bit?) of chocolate can’t fix!

Don’t worry, you won’t be singing the hangover blues heading into work on Tuesday morning– there’s no alcohol in this sexy little number (unless you want there to be of course ;) …but I’ll leave that up to you)

And the best part of this recipe? It’s GUILT FREE and SUPER EASY.


Here’s what you need:

  • 1/2 cup of almond milk (or other non-dairy milk)
  • 1/2 of a ripe banana (NOTE: I like to use a frozen banana for recipes like this because it thickens up the shakes so nicely. I always keep frozen bananas in my freezer for this very reason, or just in case I happen to have a craving for my “healthy ice cream” which I’ll post a recipe for very soon!)
  • 1-2 tablespoons of cocoa powder (depending upon how chocolaty you want your martini, I’d start with one tablespoon and add another if it’s not rich enough for you).
  • 2 packets of stevia (or your choice of sweetener–feel free to adjust to your taste)
  • 3 ice cubes
  • A generous dollop of Soyatoo Whipped Cream
  • Optional: A strawberry (for garnish), a small splash of vanilla, a dash of cinnamon, or some chocolate liqueur perhaps (I’m not lookin’!)

Directions:

Throw everything in a blender (I use my Nutribullet, but any blender or Magic Bullet will work just fine) and blend until smooth.
x
Next, GET FANCY.
x
Pour your chocolate heaven into a pretty little martini glass, garnish as you wish, and pretend like you don’t have to work tomorrow!
x
Consider this your dessert version of  nightcap ;)
x
Fabulously yours,
Ashley Michelle


BBQ Tofu, Fat-Free Cornbread, & Broccoli Slaw

Sundays and Summer

Do you have a favorite Sunday dinner?

When I was growing up, my family rarely had the opportunity sit down together for a meal during the week. Between after school activities, dance classes, track practices, and homework…we were lucky to eat something while even sitting at all! The only exception to this hectic routine was Sunday nights, when my dad would spend the day cooking a big meal and we would all sit down to eat together as a family.

I have to admit, my dad is a pretty amazing cook. Give him a handful of ingredients (any ingredients!) and he’ll whip up a gourmet meal in no time. Actually, that’s a lie. He would spend the WHOLE DAY taking his time to perfect a recipe…and though waiting was the hardest part, it would always be worth it in the end.

One of these gourmet meals that seemed simple but took FOREVER was Sunday spaghetti. The secret was his simmer-all-day-long, made-from-scratch pasta sauce with a *special ingredient.* Sorry, I can’t tell you what it is!

My dad would begin prepping in the morning and wouldn’t finish cooking until dinner was ready to go on the table that night. Normally, my dad would make the sauce with ground beef, but once I declared myself a vegetarian, he’d set aside a small pot of meat-free sauce just for me. Sometimes he would use the same sauce to make eggplant parmesan…one of my favorite vegetarian (non-vegan friendly) meals before giving up cheese!

It’s been a long time since my family has had one of those Sunday night dinners, but my boyfriend reminded me of them when he spent all day today making his favorite Sunday comfort food– spaghetti and meatballs. I was getting sick of my run of the mill Sunday night salads, so I decided to change it up a bit by putting a healthy spin on another popular type of comfort food…BARBEQUE!

I rarely use the conventional oven to cook my meals, especially on a weekend. Funny, I know. Here I am writing a recipe blog and I hardly use the most important cooking appliance in my kitchen to make myself dinner!  But honestly,  I’m usually so wiped out from going to the gym, running errands, cleaning, testing recipes, and baking healthy treats…that by the time the dinner hour rolls around, I’d rather throw some lettuce in a bowl and call it a day. But today…the boyfriend inspired me. I’ve decided to try something new.

I’ve been itching to wear my new, gold Gap flip-flops but it was rather chilly today in Boston. The sandals will have to wait another day, but who says I can’t eat like it’s summer right now? When I think summer, I think BBQ. I think about summers at the family’s beach house, corn on the cob, campfires, and grilling.

I knew JUST what to whip up– Extra Crispy BBQ tofu, ahhh-maaazing, fat-free, country cornbread, and a side of summer slaw.

Can you hear the summer peepers in the trees and the crackling of the campfire yet?

Believe me…after this meal you’ll be ready to make some Sm’ores (recipe coming soon!)


Extra Crispy BBQ Tofu & Summer Slaw: A high-protein, low-fat, twist on a summer favorite!

Serves 2

Directions:

  • Pre-heat oven to 400 °
  • Take the tofu out of the package and pat dry with paper towels. Wrap tofu in a couple sheets of paper towels, set on a plate and put another heavy plate on top of it as if you are making a tofu/plate sandwich. This will help get any excess moisture out of the tofu before cooking.
  • Put about 1/2 cup BBQ sauce in a small bowl. Do the same with breadcrumbs. (You will probably need more of each but start with this for now.)
  • Put tinfoil on a cookie sheet and spritz with all-natural cooking spray.
  • Unwrap the tofu and slice it into 7 pieces (you can cut it thicker or thinner depending upon how crispy/soft you want it to be).
  • Sprinkle the tofu with garlic powder and onion powder.
  • Take you first piece of tofu and dip it in the BBQ sauce, making sure the entire piece is coated.
  • Dip your BBQ tofu in the breadcrumbs and place it on your cookie sheet. Again, make sure all sides are breaded!
  • Continue coating and breading the remaining tofu slices.
  • Place your cookie sheet/tofu in the oven and bake for 40-45 minutes (flip half way through). I like my tofu EXTRA crispy, so if you prefer softer tofu, just don’t keep it in as long.
  • Drizzle some more BBQ sauce (or even all-naural ketchup!) on top for an extra kick!
Summer Slaw:
  • 2-3 cups of broccoli slaw (I use the Trader Joe’s kind)
  • 2 heaping spoonfuls of hot & sweet mustard (I couldn’t find a link, but I love the Trader Joe’s brand)
  • 1 heaping spoonful whole grain Dijon mustard  (I like the Trader Joe’s kind)
  • 2 tablespoons Bragg’s Liquid Aminos
  • Splash of apple cider vinegar (I use Bragg’s apple cider vinegar)
  • salt and pepper to taste (I usually omit the salt, but feel free to add it in)


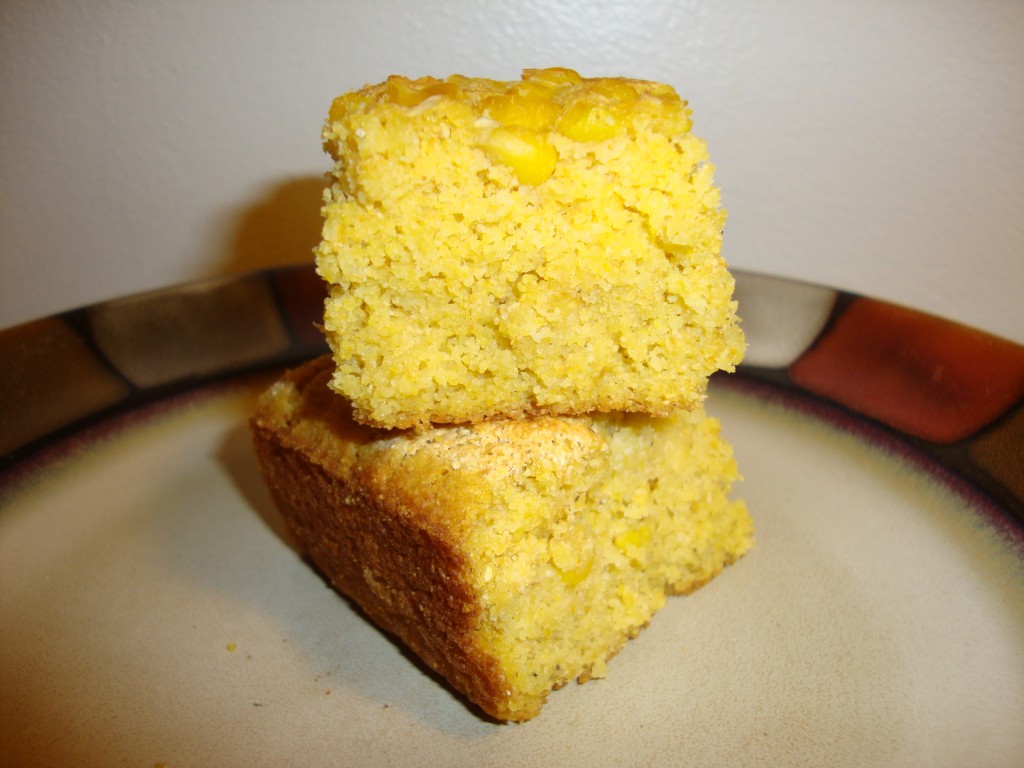
Ahhhh-Mazzzzing Fat-Free Country Cornbread: Sweet and savory…without the guilt or gluten!

I'm sooo sweet....and FAT FREE!

Dry ingredients:

Wet Ingredients:
  • 1 tablespoon apple cider vinegar (I use Bragg’s apple cider vinegar)
  • 1 tablespoon 100% pure maple syrup
  • 1/4 cup plus 2 heaping tablespoons of apple sauce
  • one 15 oz. can of unsalted corn (leave 1/4 cup for sprinkling on top)
Directions:
  • Pre-heat oven to 430°
  • Spray an 8×8 pan with all-natural cooking spray
  • Combine all the dry ingredients in a bowl and mix well
  • Blend all the wet ingredients together (I used a magic bullet to blend mine because I didn’t want my cornbread to have whole bits of corn in it, but I am sure it would taste great either way).
  • Add the wet ingredients into the dry ingredients and mix well.
  • Pour batter into pan and sprinkle with remaining corn.
  • Bake for  30- 35 minutes or until sides begin to separate from pan. The top should begin to crack and look slightly dry
Now the hard part…
Wait 15 minutes or so until it the cornbread is slightly cooled. Cut into squares, add a smear of Earth Balance if you’re feeling crazy and want to pretend you’re at a backyard BBQ :)


Let’s chat!

Did your family have sit-down dinners together every night? What’s your favorite summer comfort food? Aside from BBQ-style food, I’d have to say my favorite summer food isn’t exactly a meal…but more like a snack. To me, there’s nothing more summery than eating Bing cherries on the beach! The fact that you can easily wash your hands off in the water is even better, because those babies are messy and extra juicy :)
Healthfully yours,
Ashley Michelle